> ## Documentation Index
> Fetch the complete documentation index at: https://docs.runrox.com/llms.txt
> Use this file to discover all available pages before exploring further.
# Usage Example
We have also prepared several examples of how to use the indicator. These are standard entry models taken from the classic Smart Money concept.
**First Example**
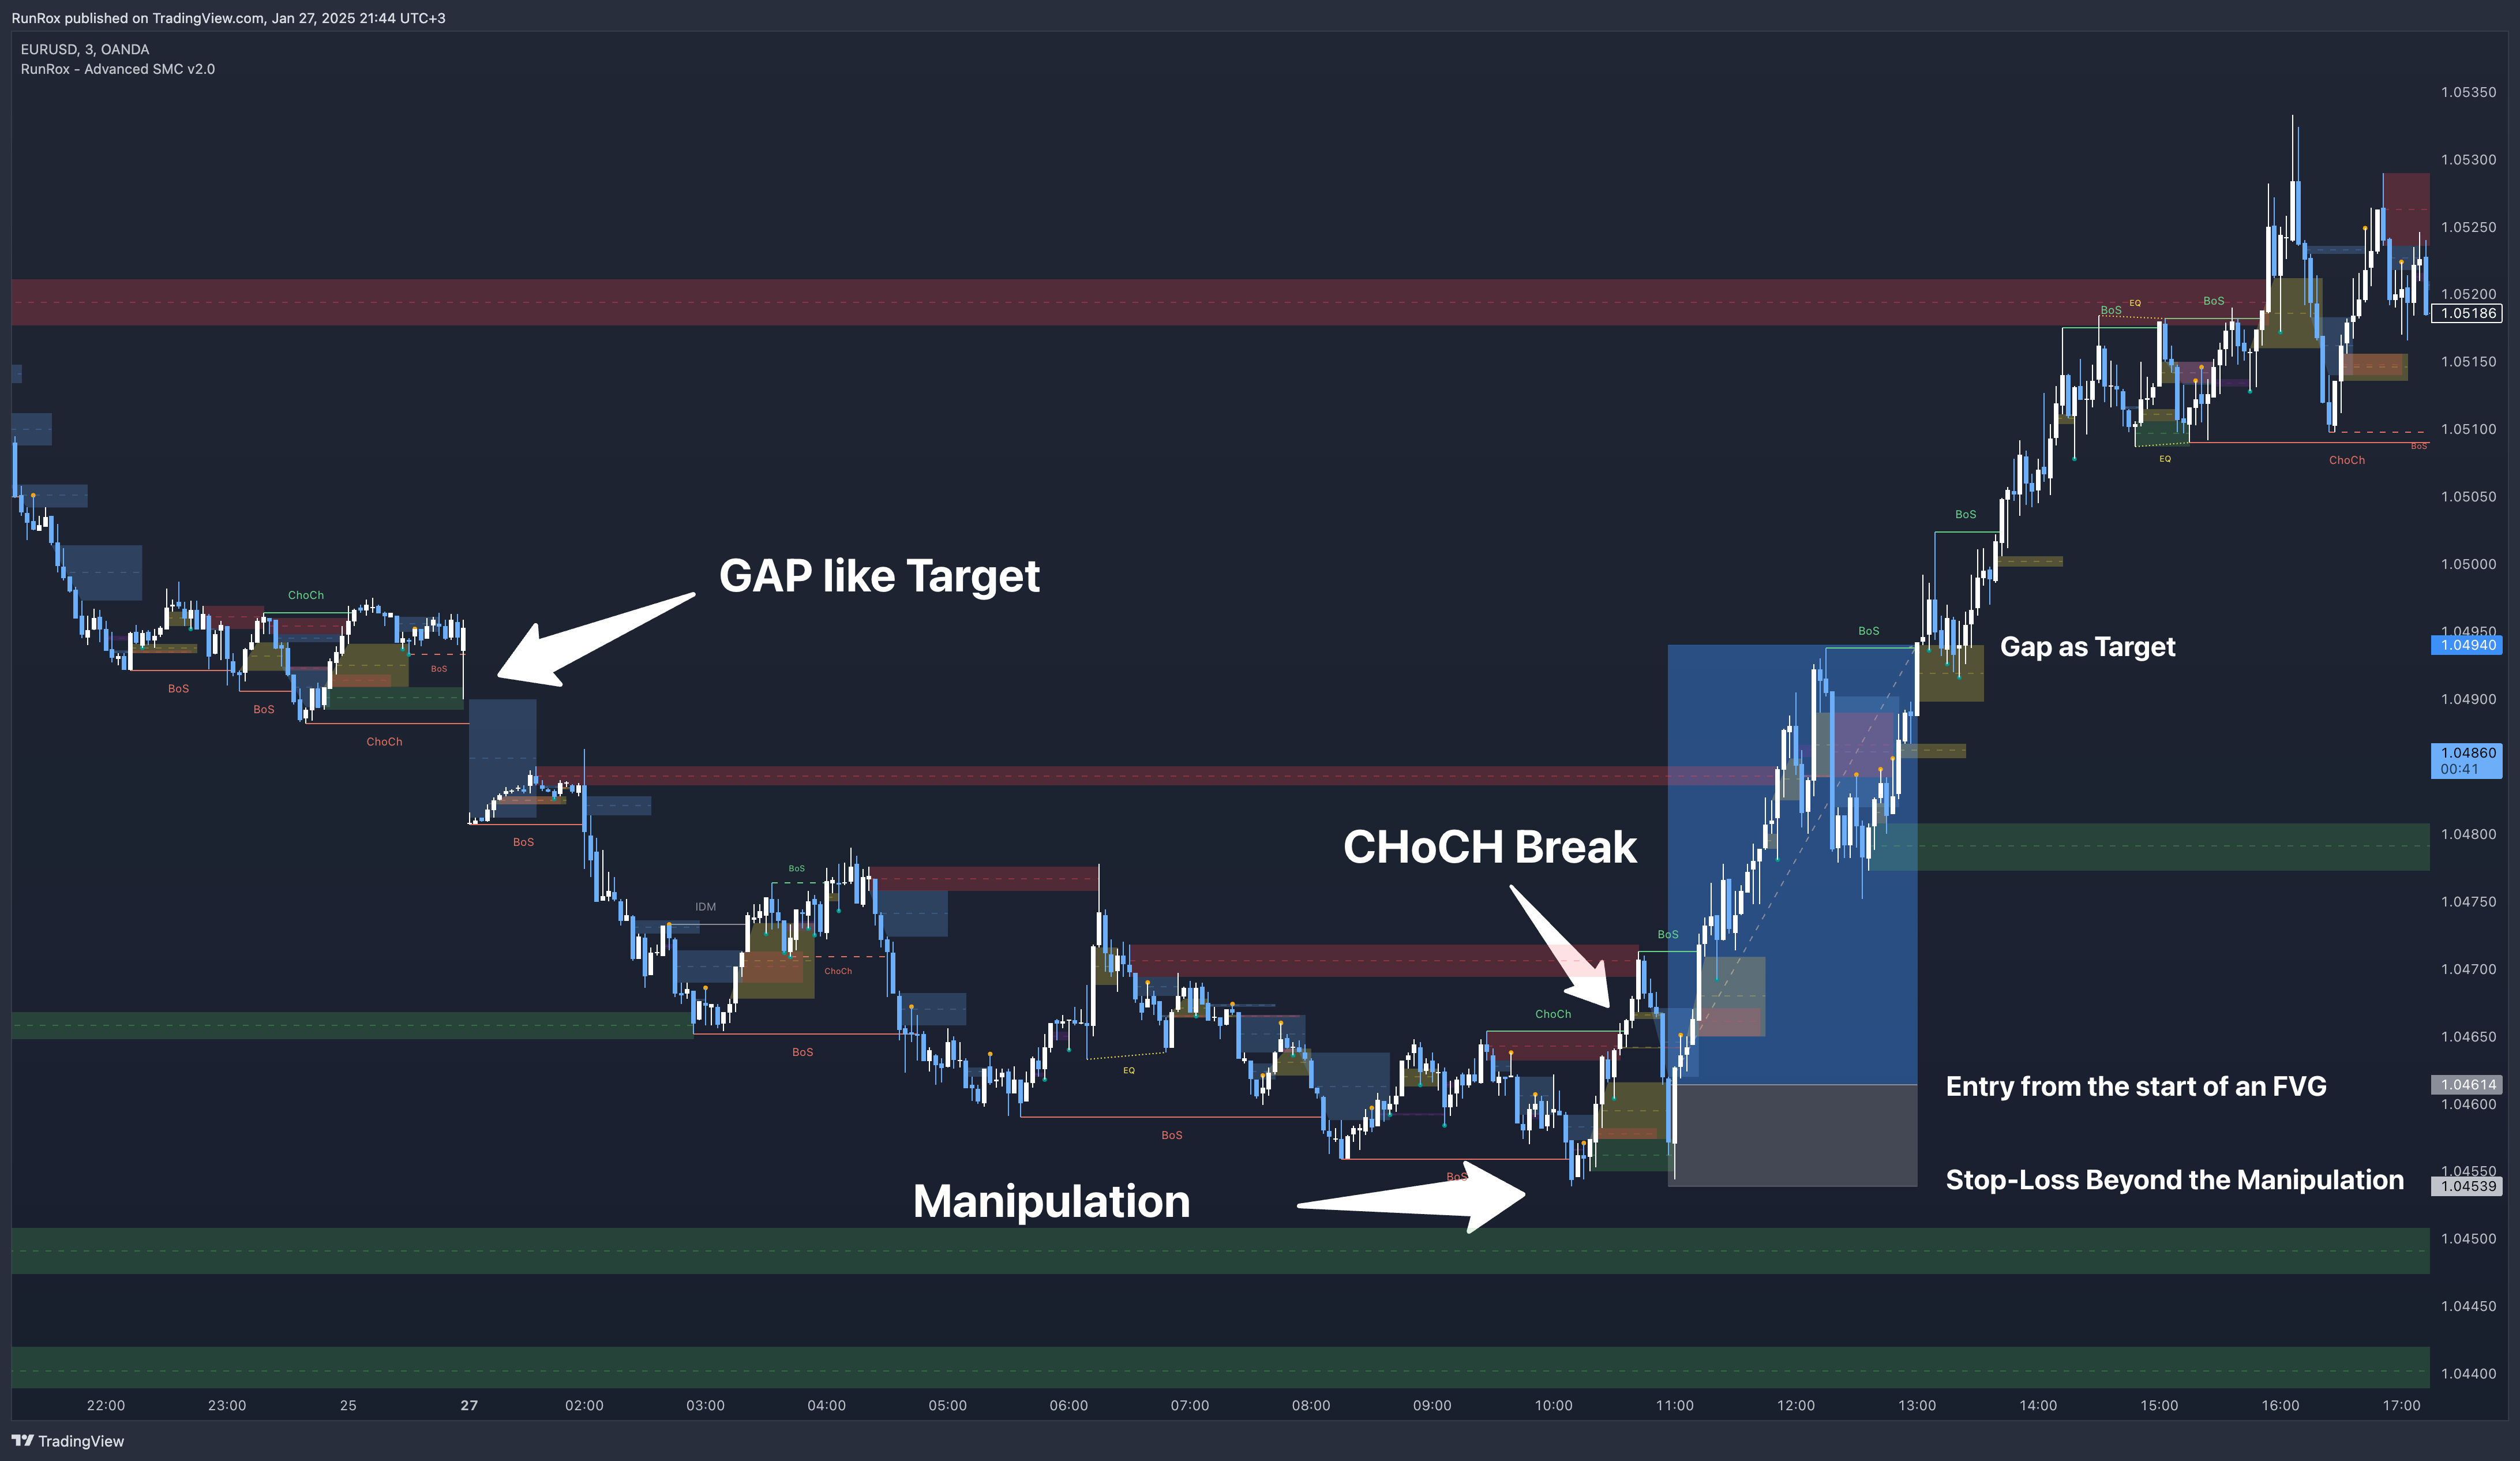 In the screenshot above, the market displays a downward structure until a manipulation occurs, followed by a CHoCH break. This is a standard entry model featuring an entry at the nearest FVG, a stop-loss placed beyond the manipulation, and a target at the nearest liquidity zone—whether session-based or, as in our case, a gap (one of the FVG types) that price commonly revisits.\
\
This is considered a more aggressive entry because we only waited for a single confirmation of the trend change—the CHoCH break—and then entered immediately afterward. While the WinRate might be lower in such trades, the Risk-Reward ratio is typically very high if you correctly identify the manipulation.\
\
**Second Example**
In the screenshot above, the market displays a downward structure until a manipulation occurs, followed by a CHoCH break. This is a standard entry model featuring an entry at the nearest FVG, a stop-loss placed beyond the manipulation, and a target at the nearest liquidity zone—whether session-based or, as in our case, a gap (one of the FVG types) that price commonly revisits.\
\
This is considered a more aggressive entry because we only waited for a single confirmation of the trend change—the CHoCH break—and then entered immediately afterward. While the WinRate might be lower in such trades, the Risk-Reward ratio is typically very high if you correctly identify the manipulation.\
\
**Second Example**
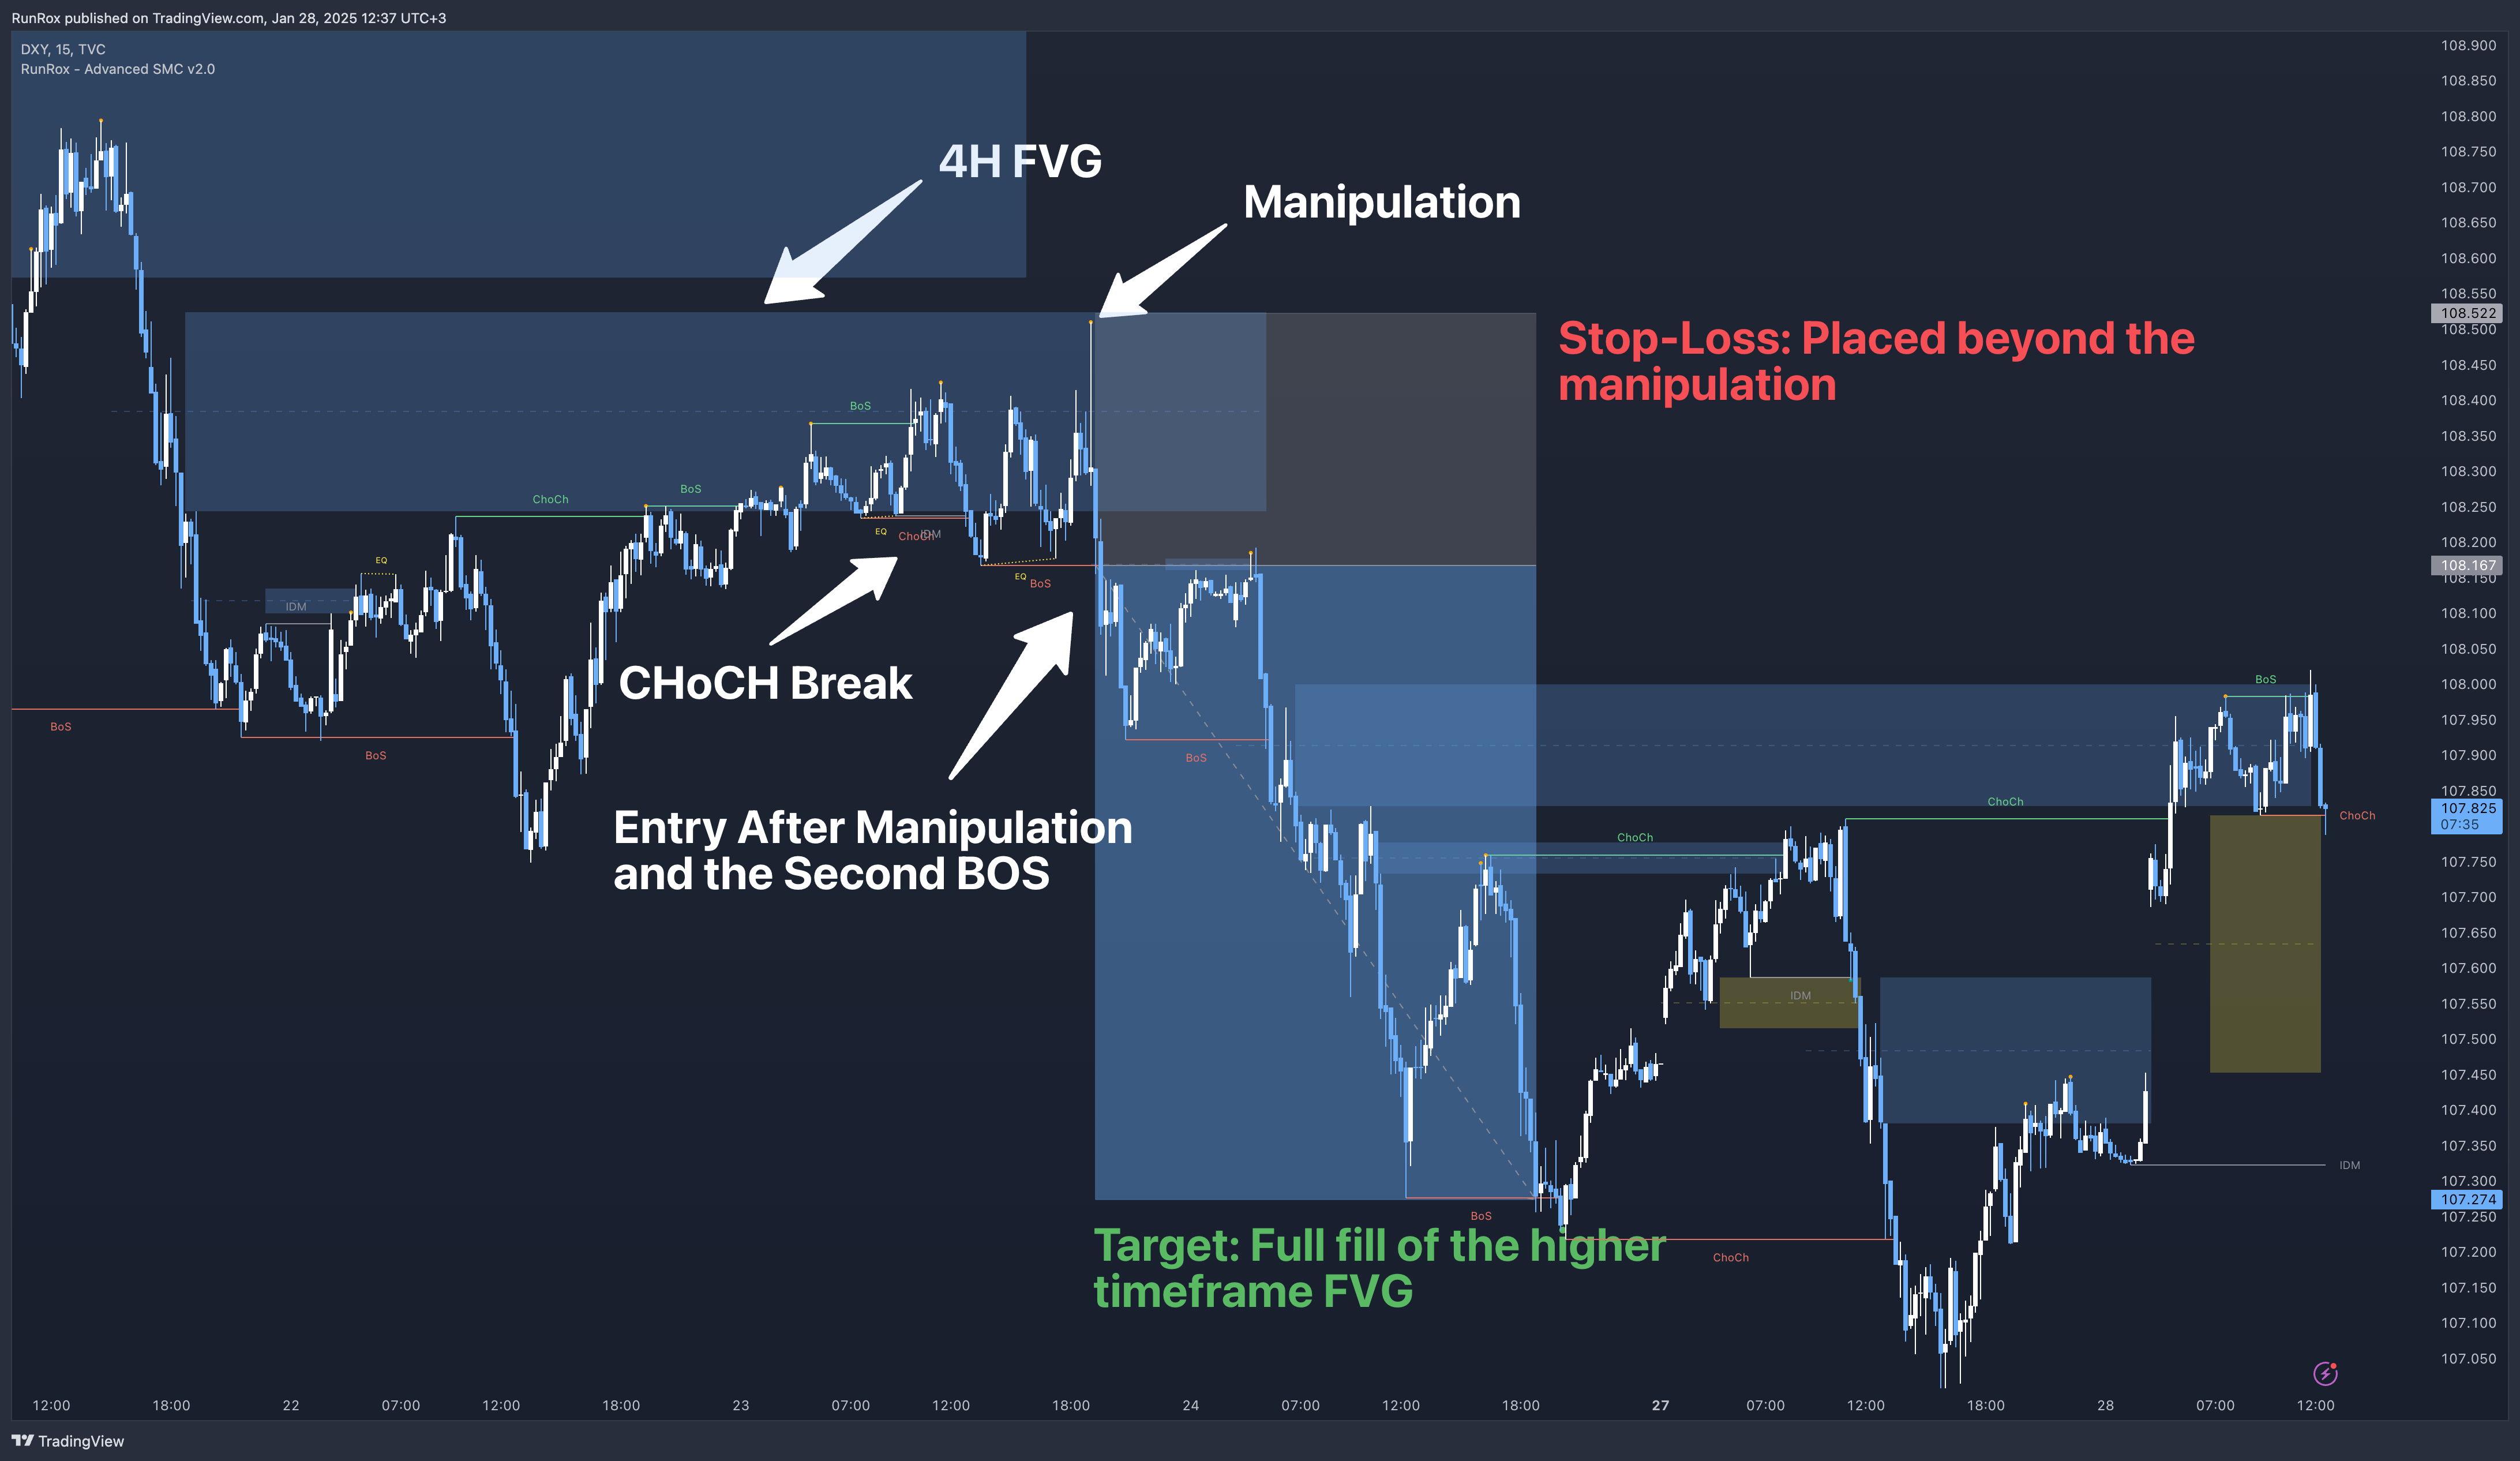 This approach is more conservative and less risky, typically offering a higher WinRate but with a lower Risk-Reward ratio.\
\
Here, we use the 4H FVG as our decision point (POI). With the indicator, we plot the 4-hour FVG on our current chart without needing to switch back and forth between timeframes.\
\
Once price reaches our POI, we look for an entry model that includes three confirmations:
1. **First Confirmation** – A CHoCH break.
2. **Second Confirmation** – A manipulation.
3. **Third Confirmation** – A second BOS break.
We wait for all these confirmations before entering the trade, ensuring our stop-loss is well-protected since the remaining liquidity has been swept and the 4-hour FVG has been fully filled.\
\
Our target is the full fill of a higher timeframe FVG or other high-liquidity levels below.\
\
In a conservative setup, it is crucial to allow a complete OrderFlow to develop, including manipulations and clear breaks of lower levels. This approach helps protect the trade and often results in a higher WinRate.
**Disclaimer**\
\
Past performance is not indicative of future results. To trade successfully, it is crucial to have a thorough understanding of the market context and the specific situation at hand. Always conduct your own research and analysis before making any trading decisions.
This approach is more conservative and less risky, typically offering a higher WinRate but with a lower Risk-Reward ratio.\
\
Here, we use the 4H FVG as our decision point (POI). With the indicator, we plot the 4-hour FVG on our current chart without needing to switch back and forth between timeframes.\
\
Once price reaches our POI, we look for an entry model that includes three confirmations:
1. **First Confirmation** – A CHoCH break.
2. **Second Confirmation** – A manipulation.
3. **Third Confirmation** – A second BOS break.
We wait for all these confirmations before entering the trade, ensuring our stop-loss is well-protected since the remaining liquidity has been swept and the 4-hour FVG has been fully filled.\
\
Our target is the full fill of a higher timeframe FVG or other high-liquidity levels below.\
\
In a conservative setup, it is crucial to allow a complete OrderFlow to develop, including manipulations and clear breaks of lower levels. This approach helps protect the trade and often results in a higher WinRate.
**Disclaimer**\
\
Past performance is not indicative of future results. To trade successfully, it is crucial to have a thorough understanding of the market context and the specific situation at hand. Always conduct your own research and analysis before making any trading decisions.