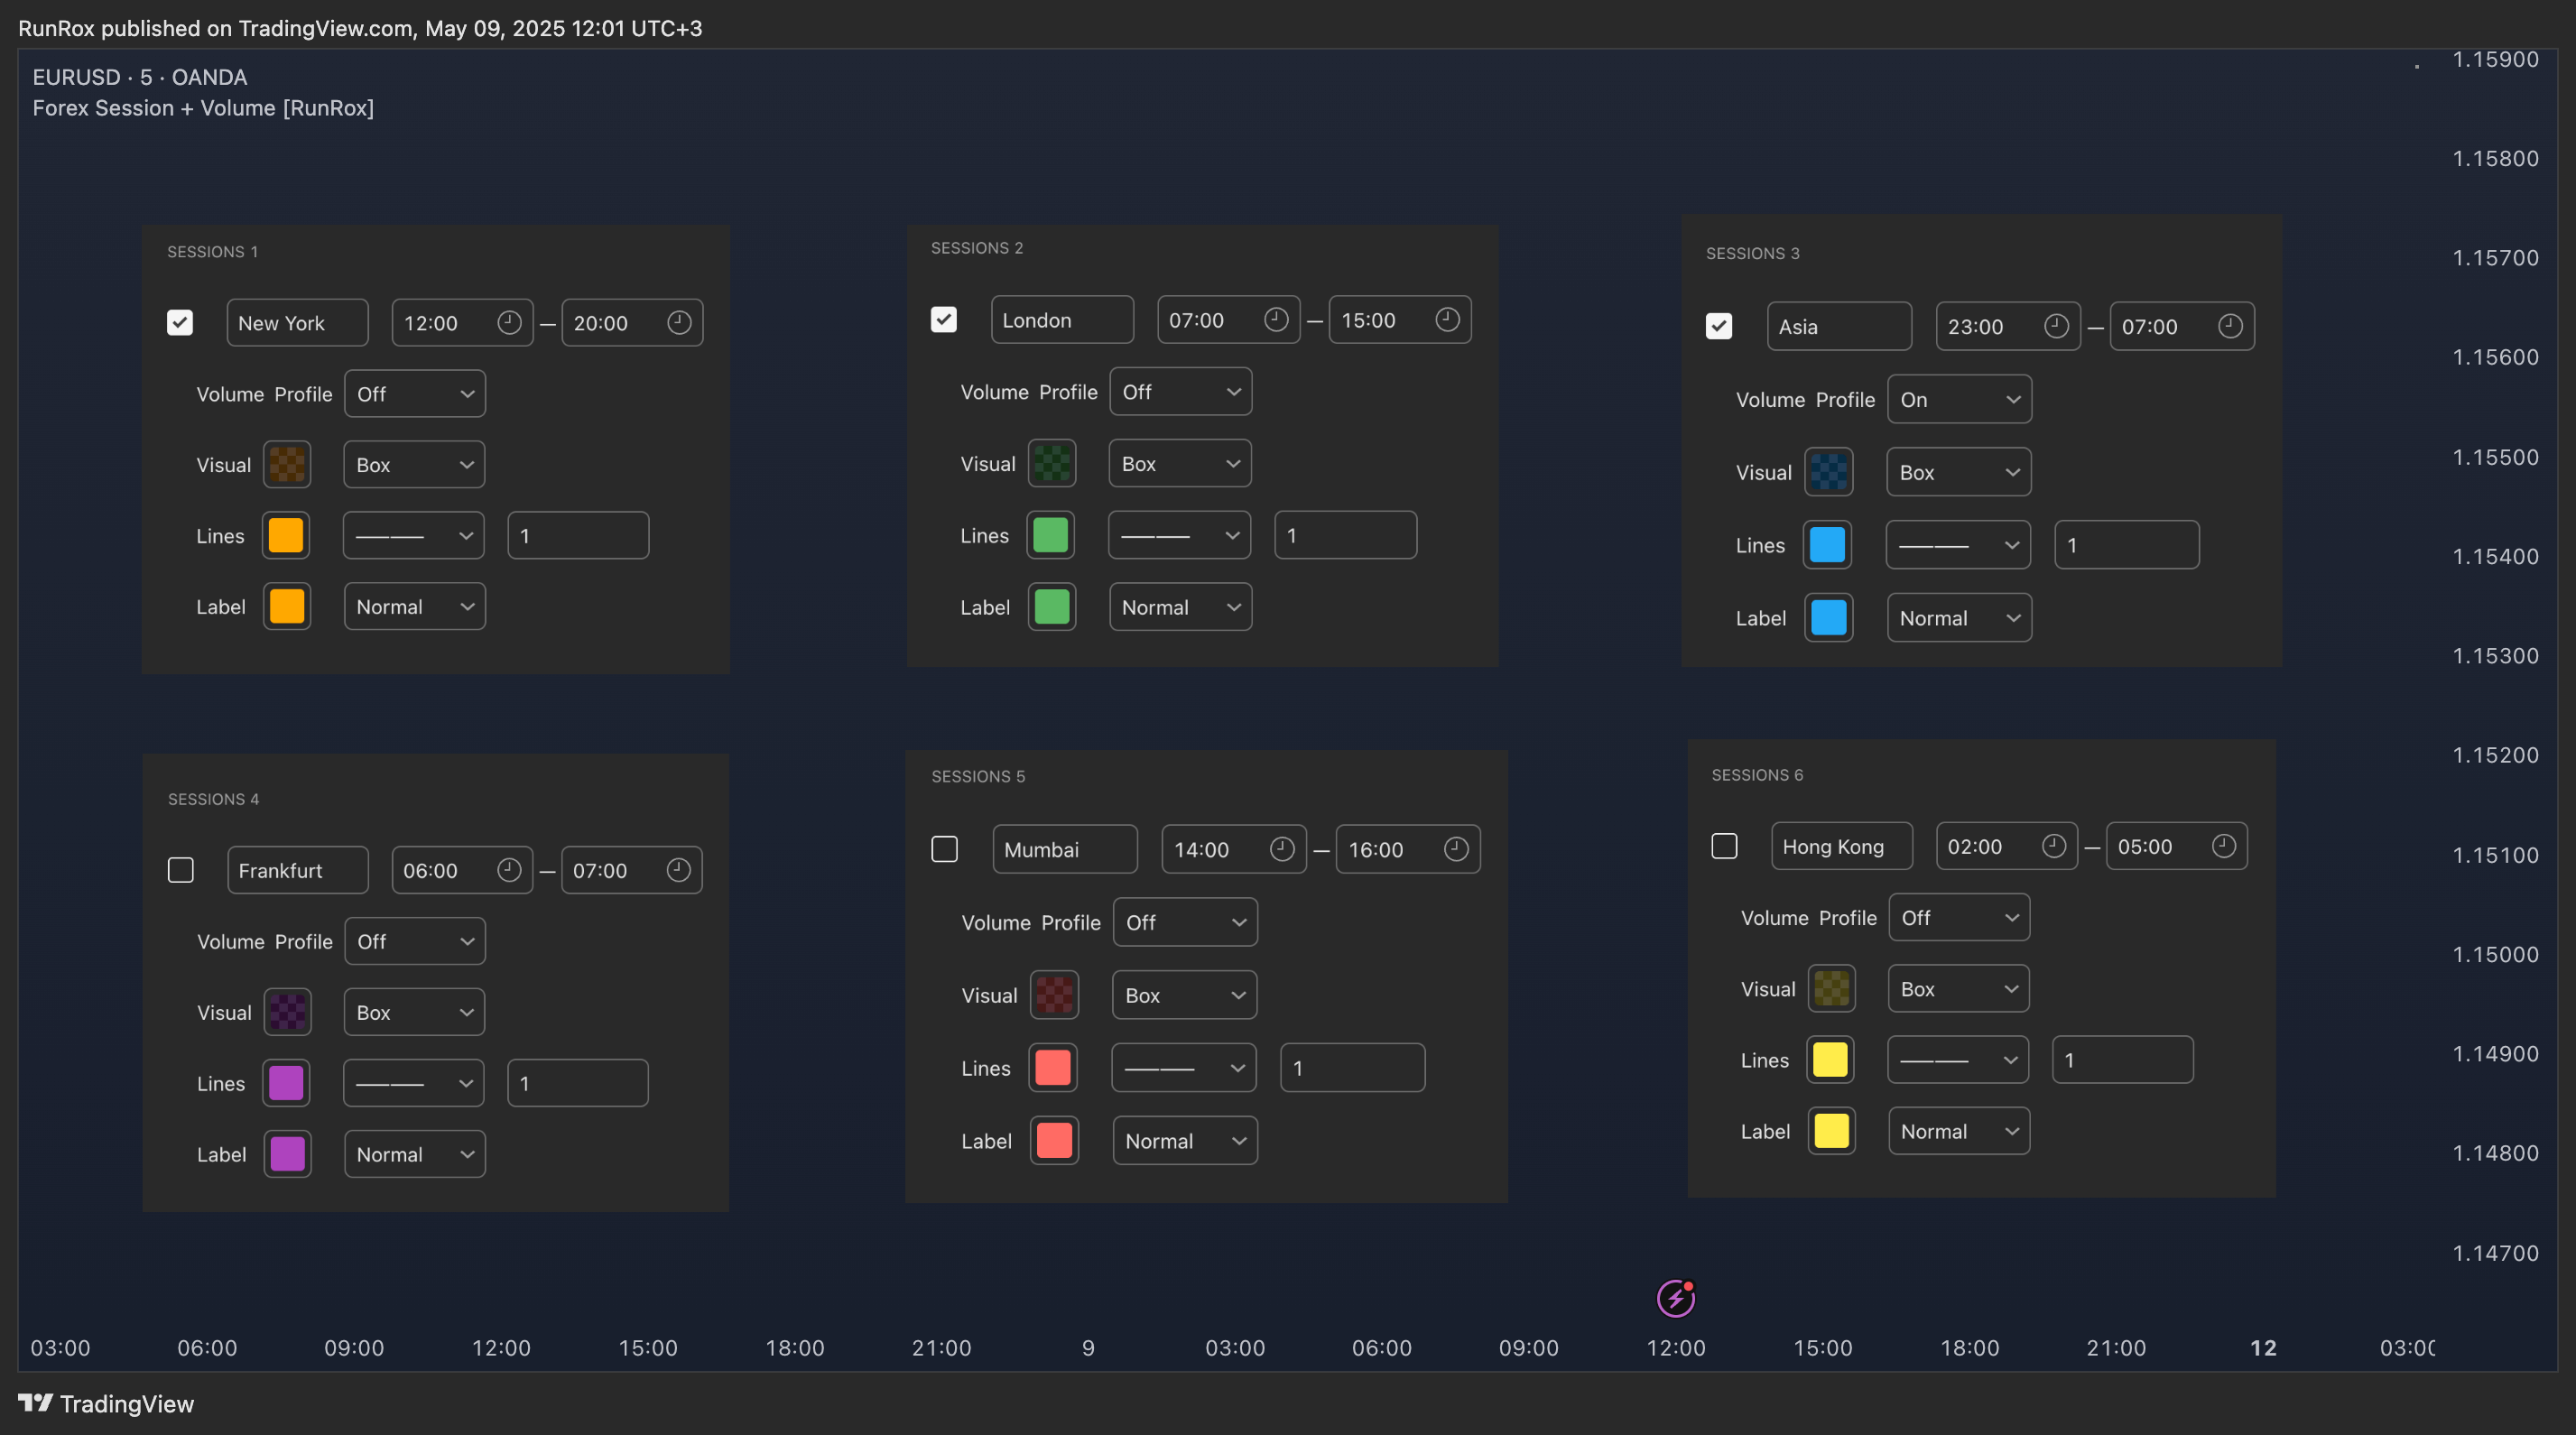
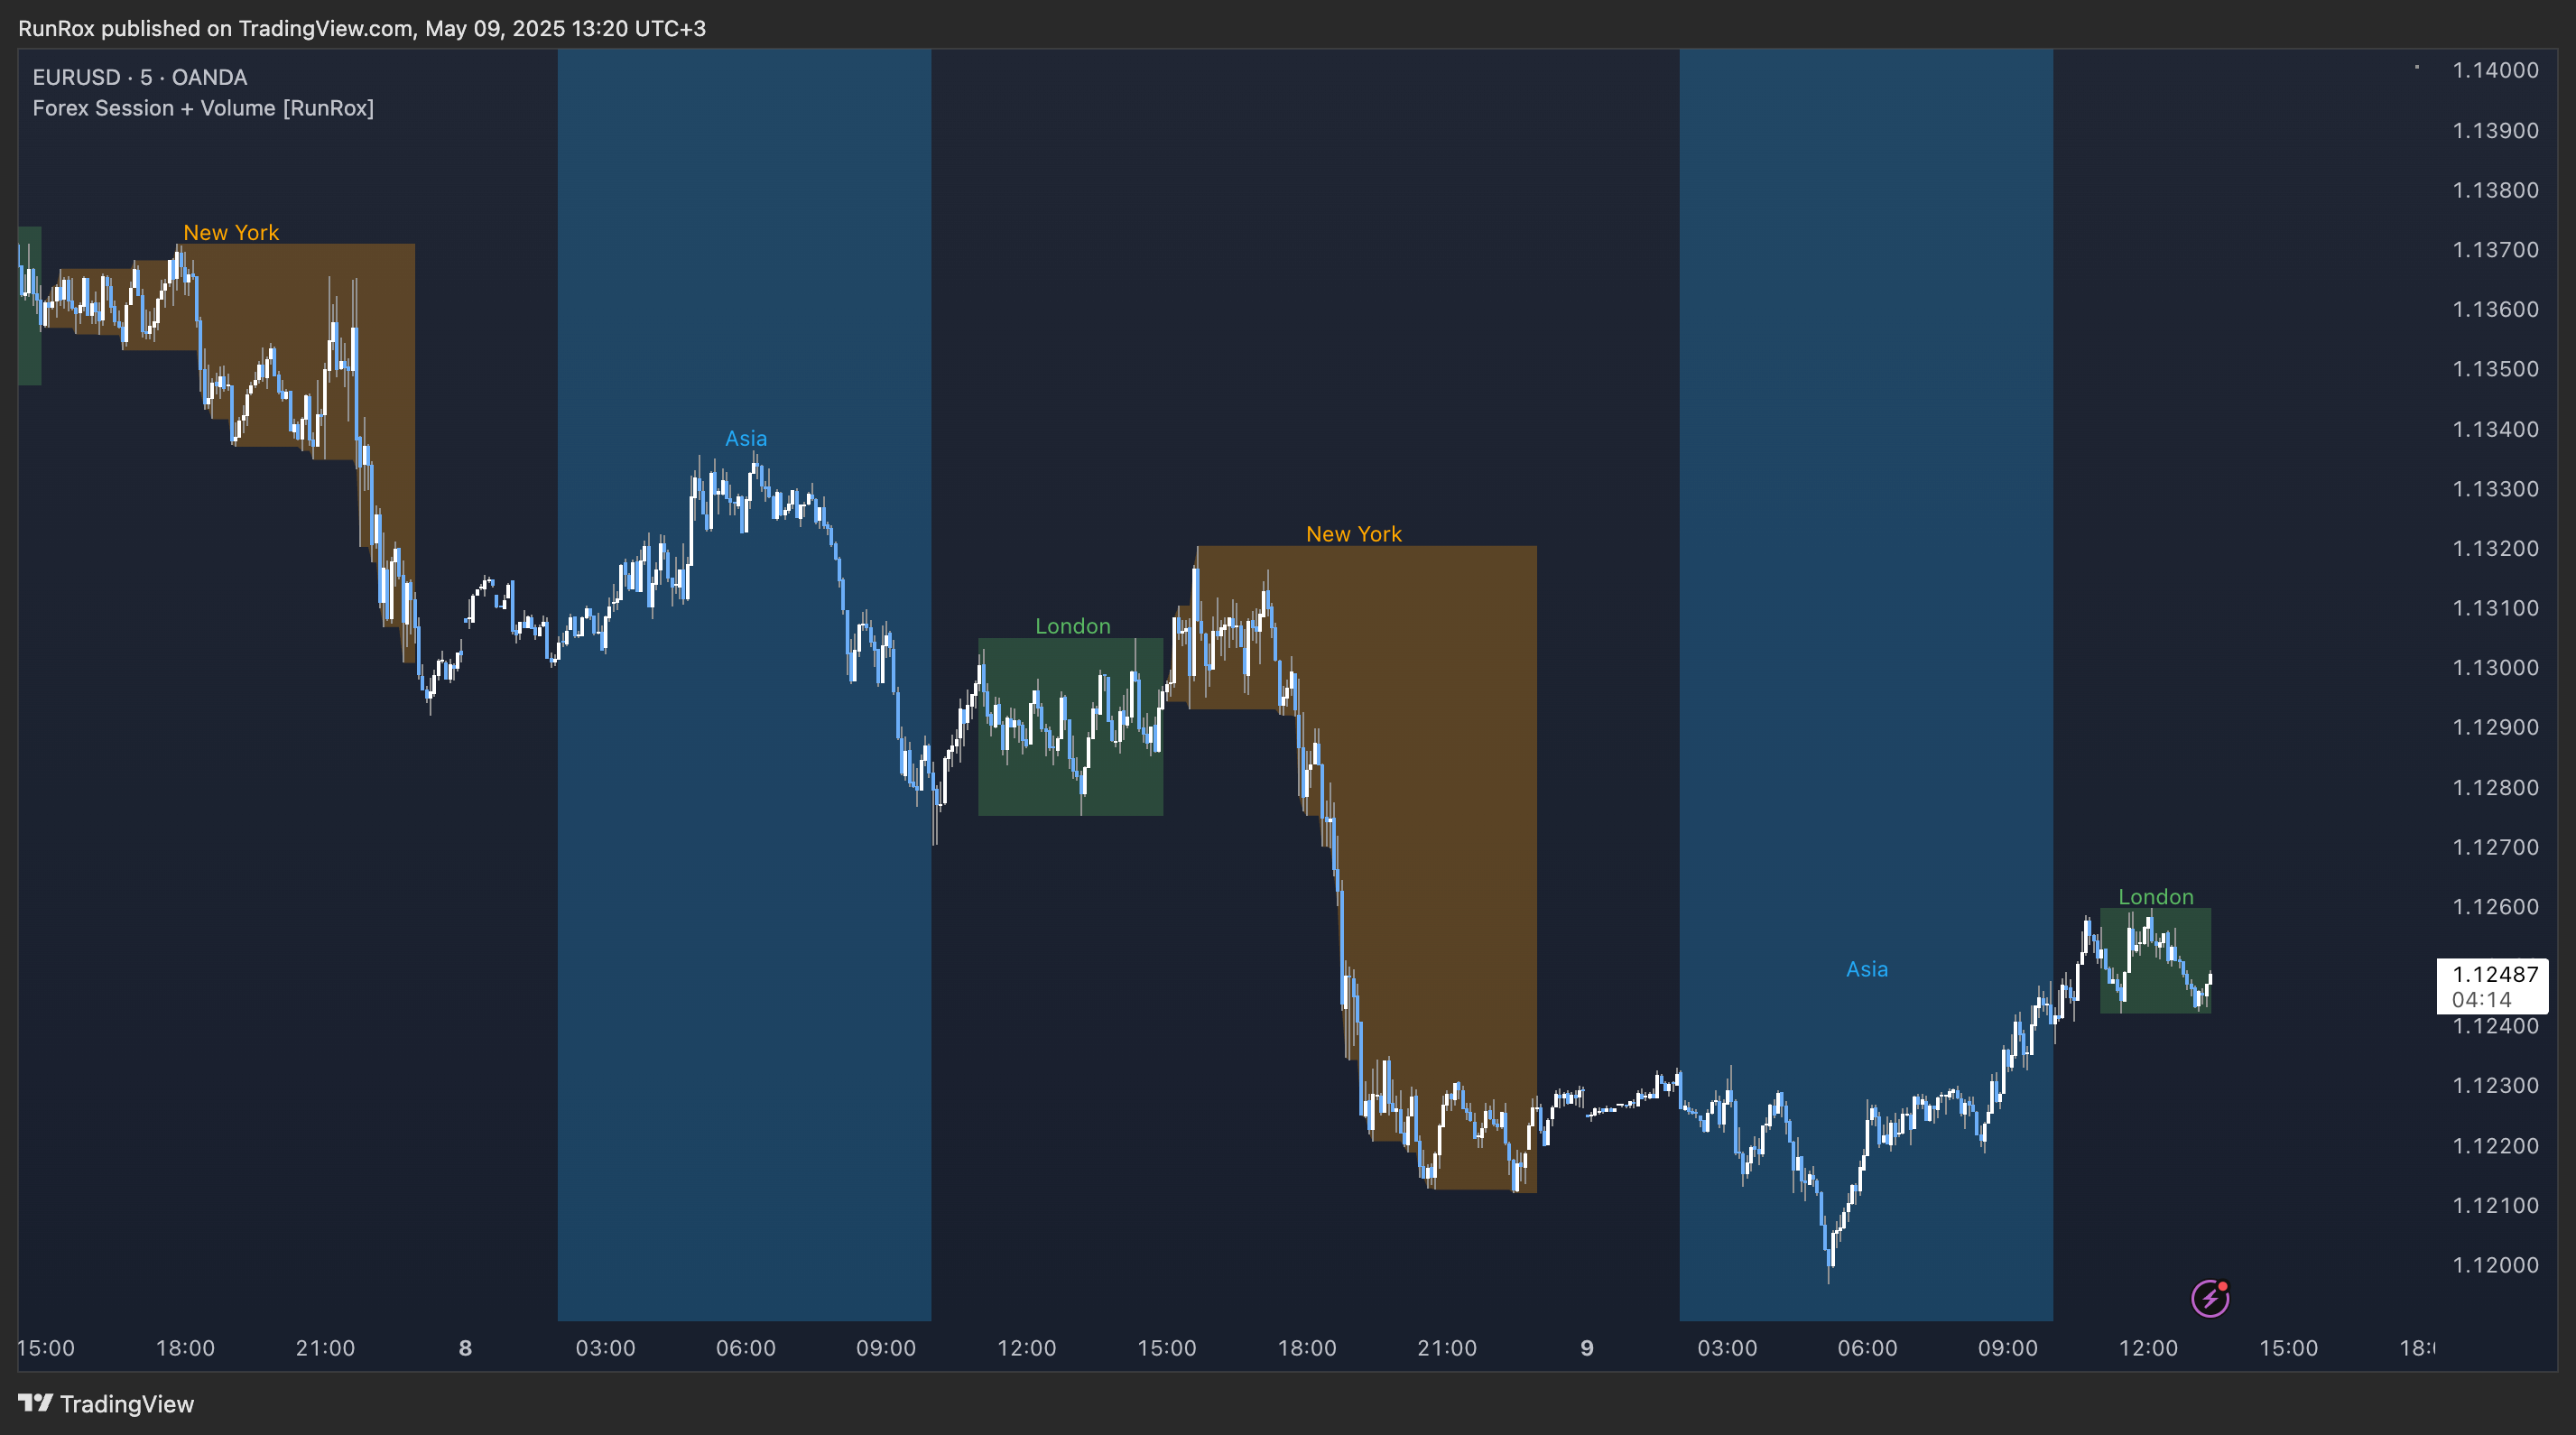
- 6 fully customizable sessions
- Kill Zone (the high-impact trading window)
- Volume Profile for each session
- POC / VAL / VAH / LVN levels (Point of Control, Value Area Low, Value Area High, Low Volume Node)
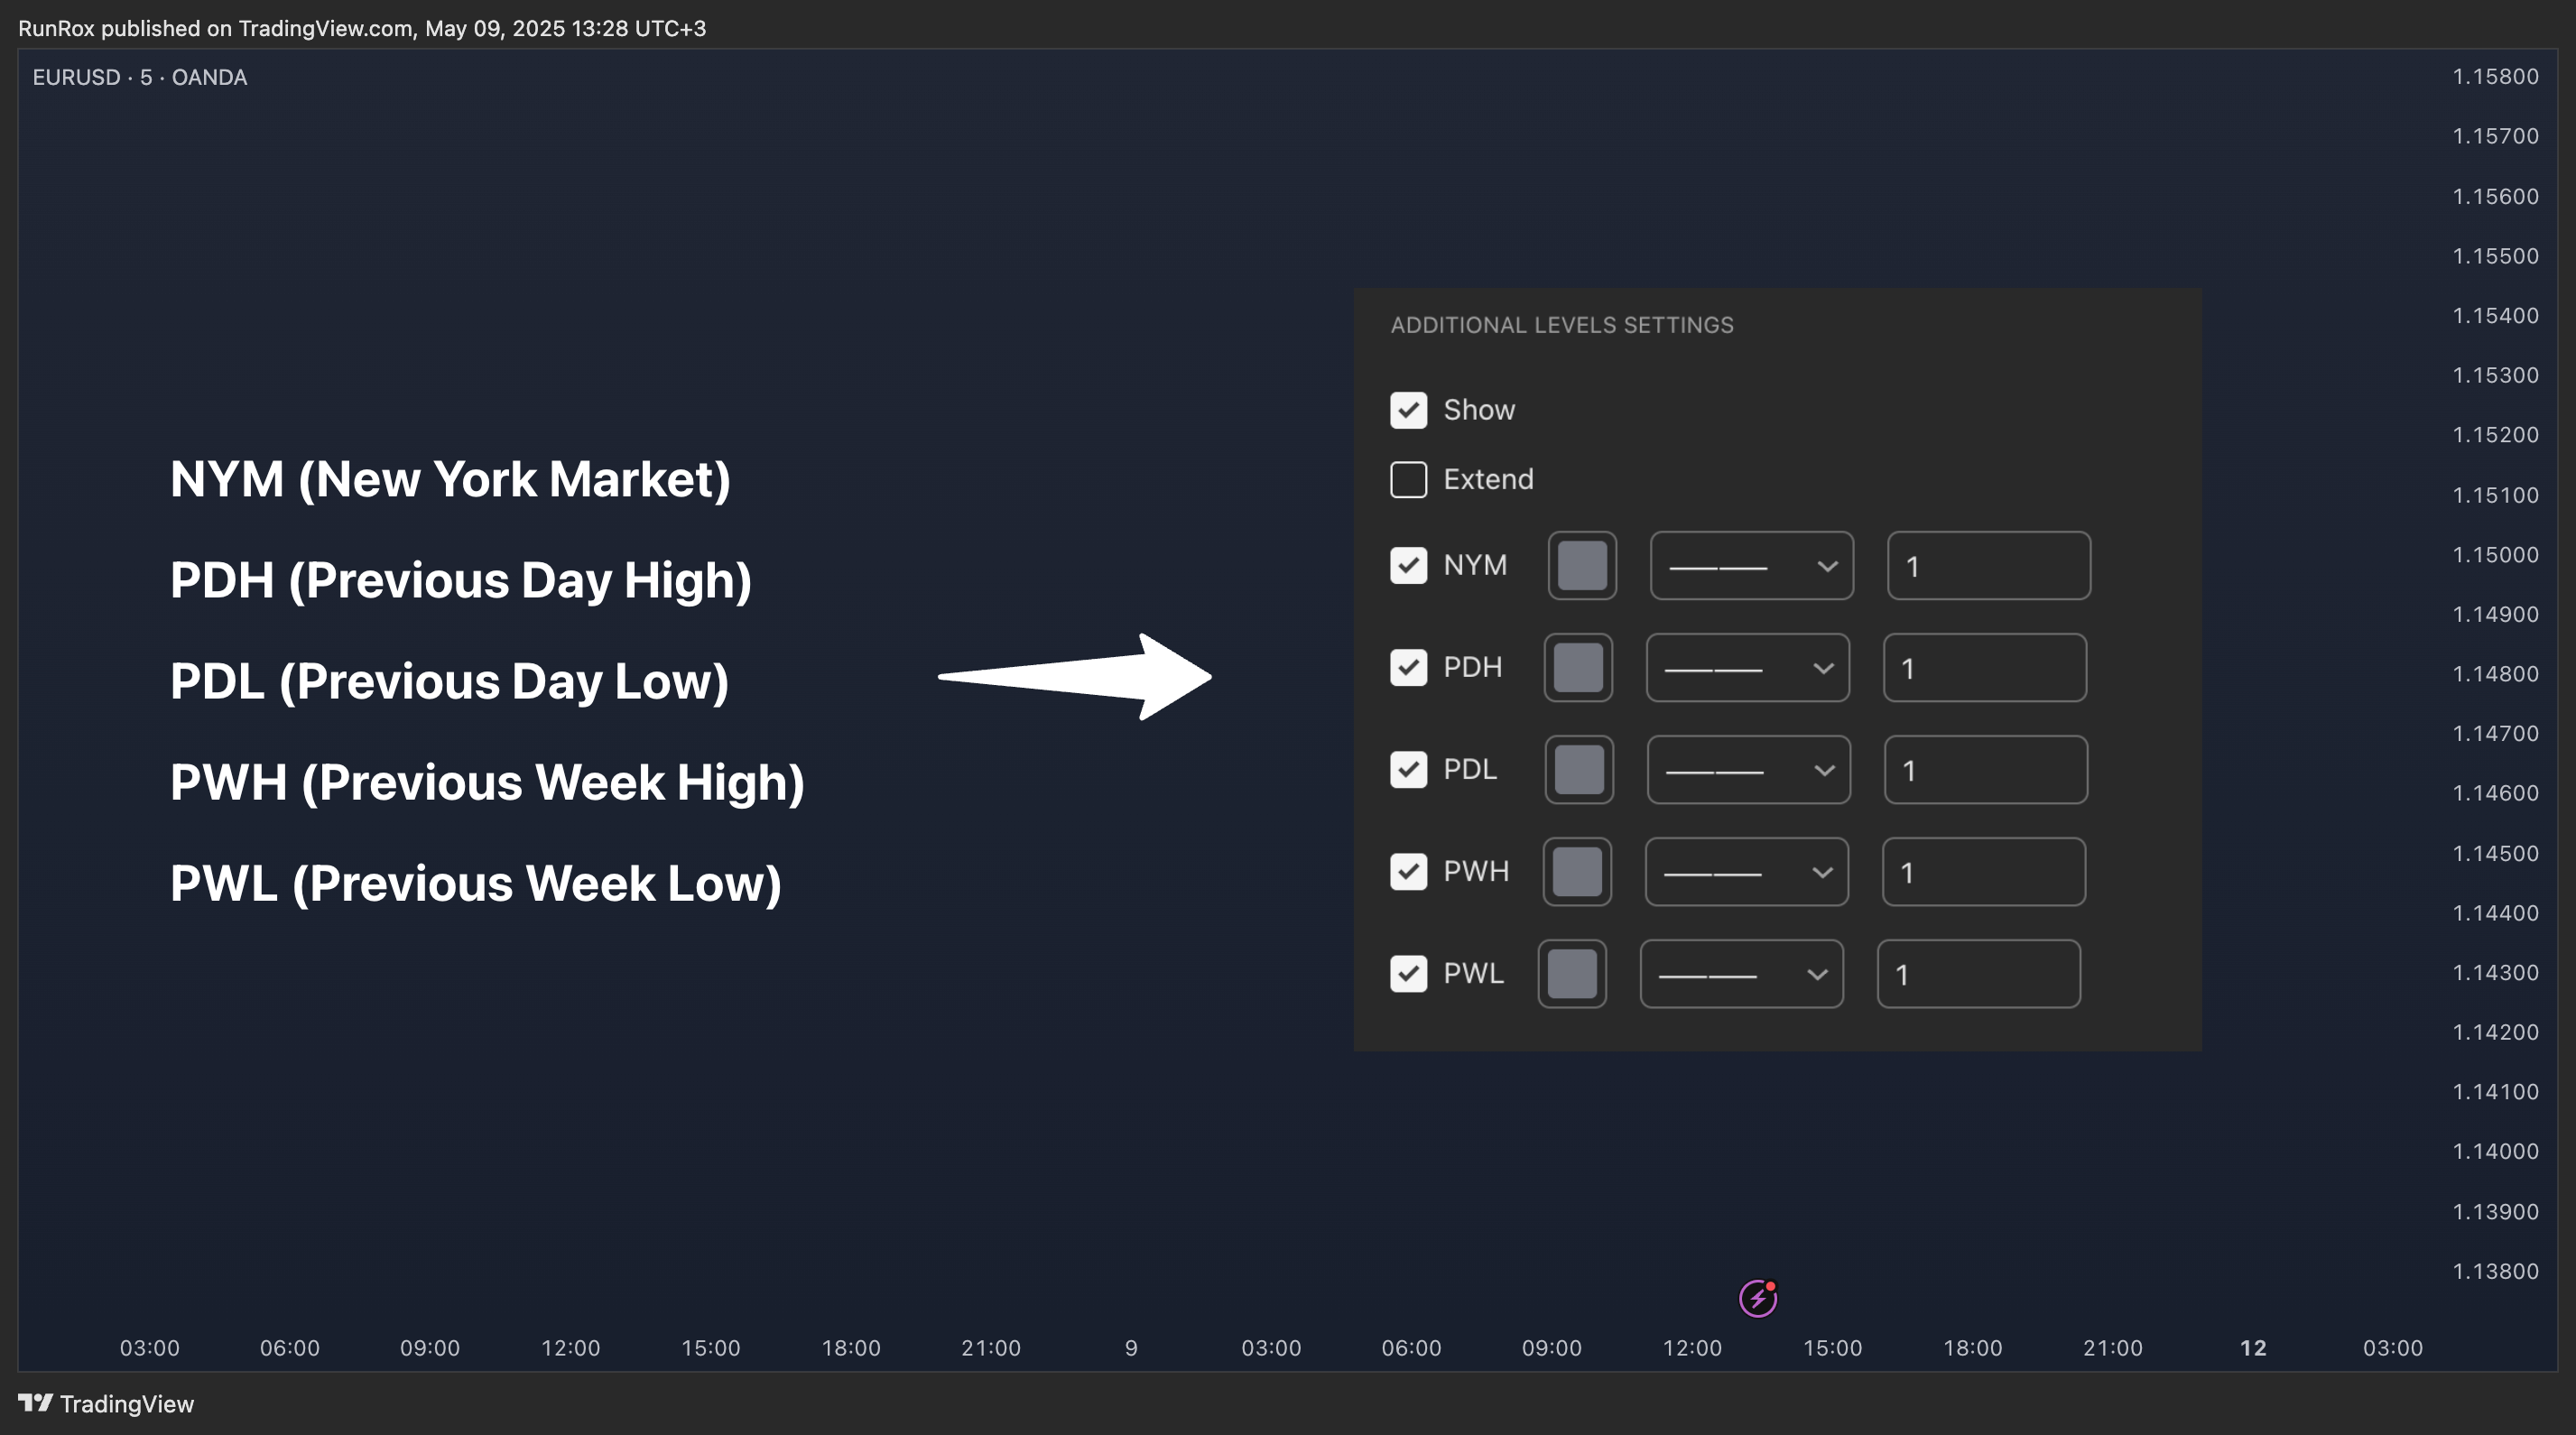
- PDH / PDL levels (Previous Day High / Low)
- PWH / PWL levels (Previous Week High / Low)
- NYM level (New York Market level)
- Active sessions table
- 5 style options for each session
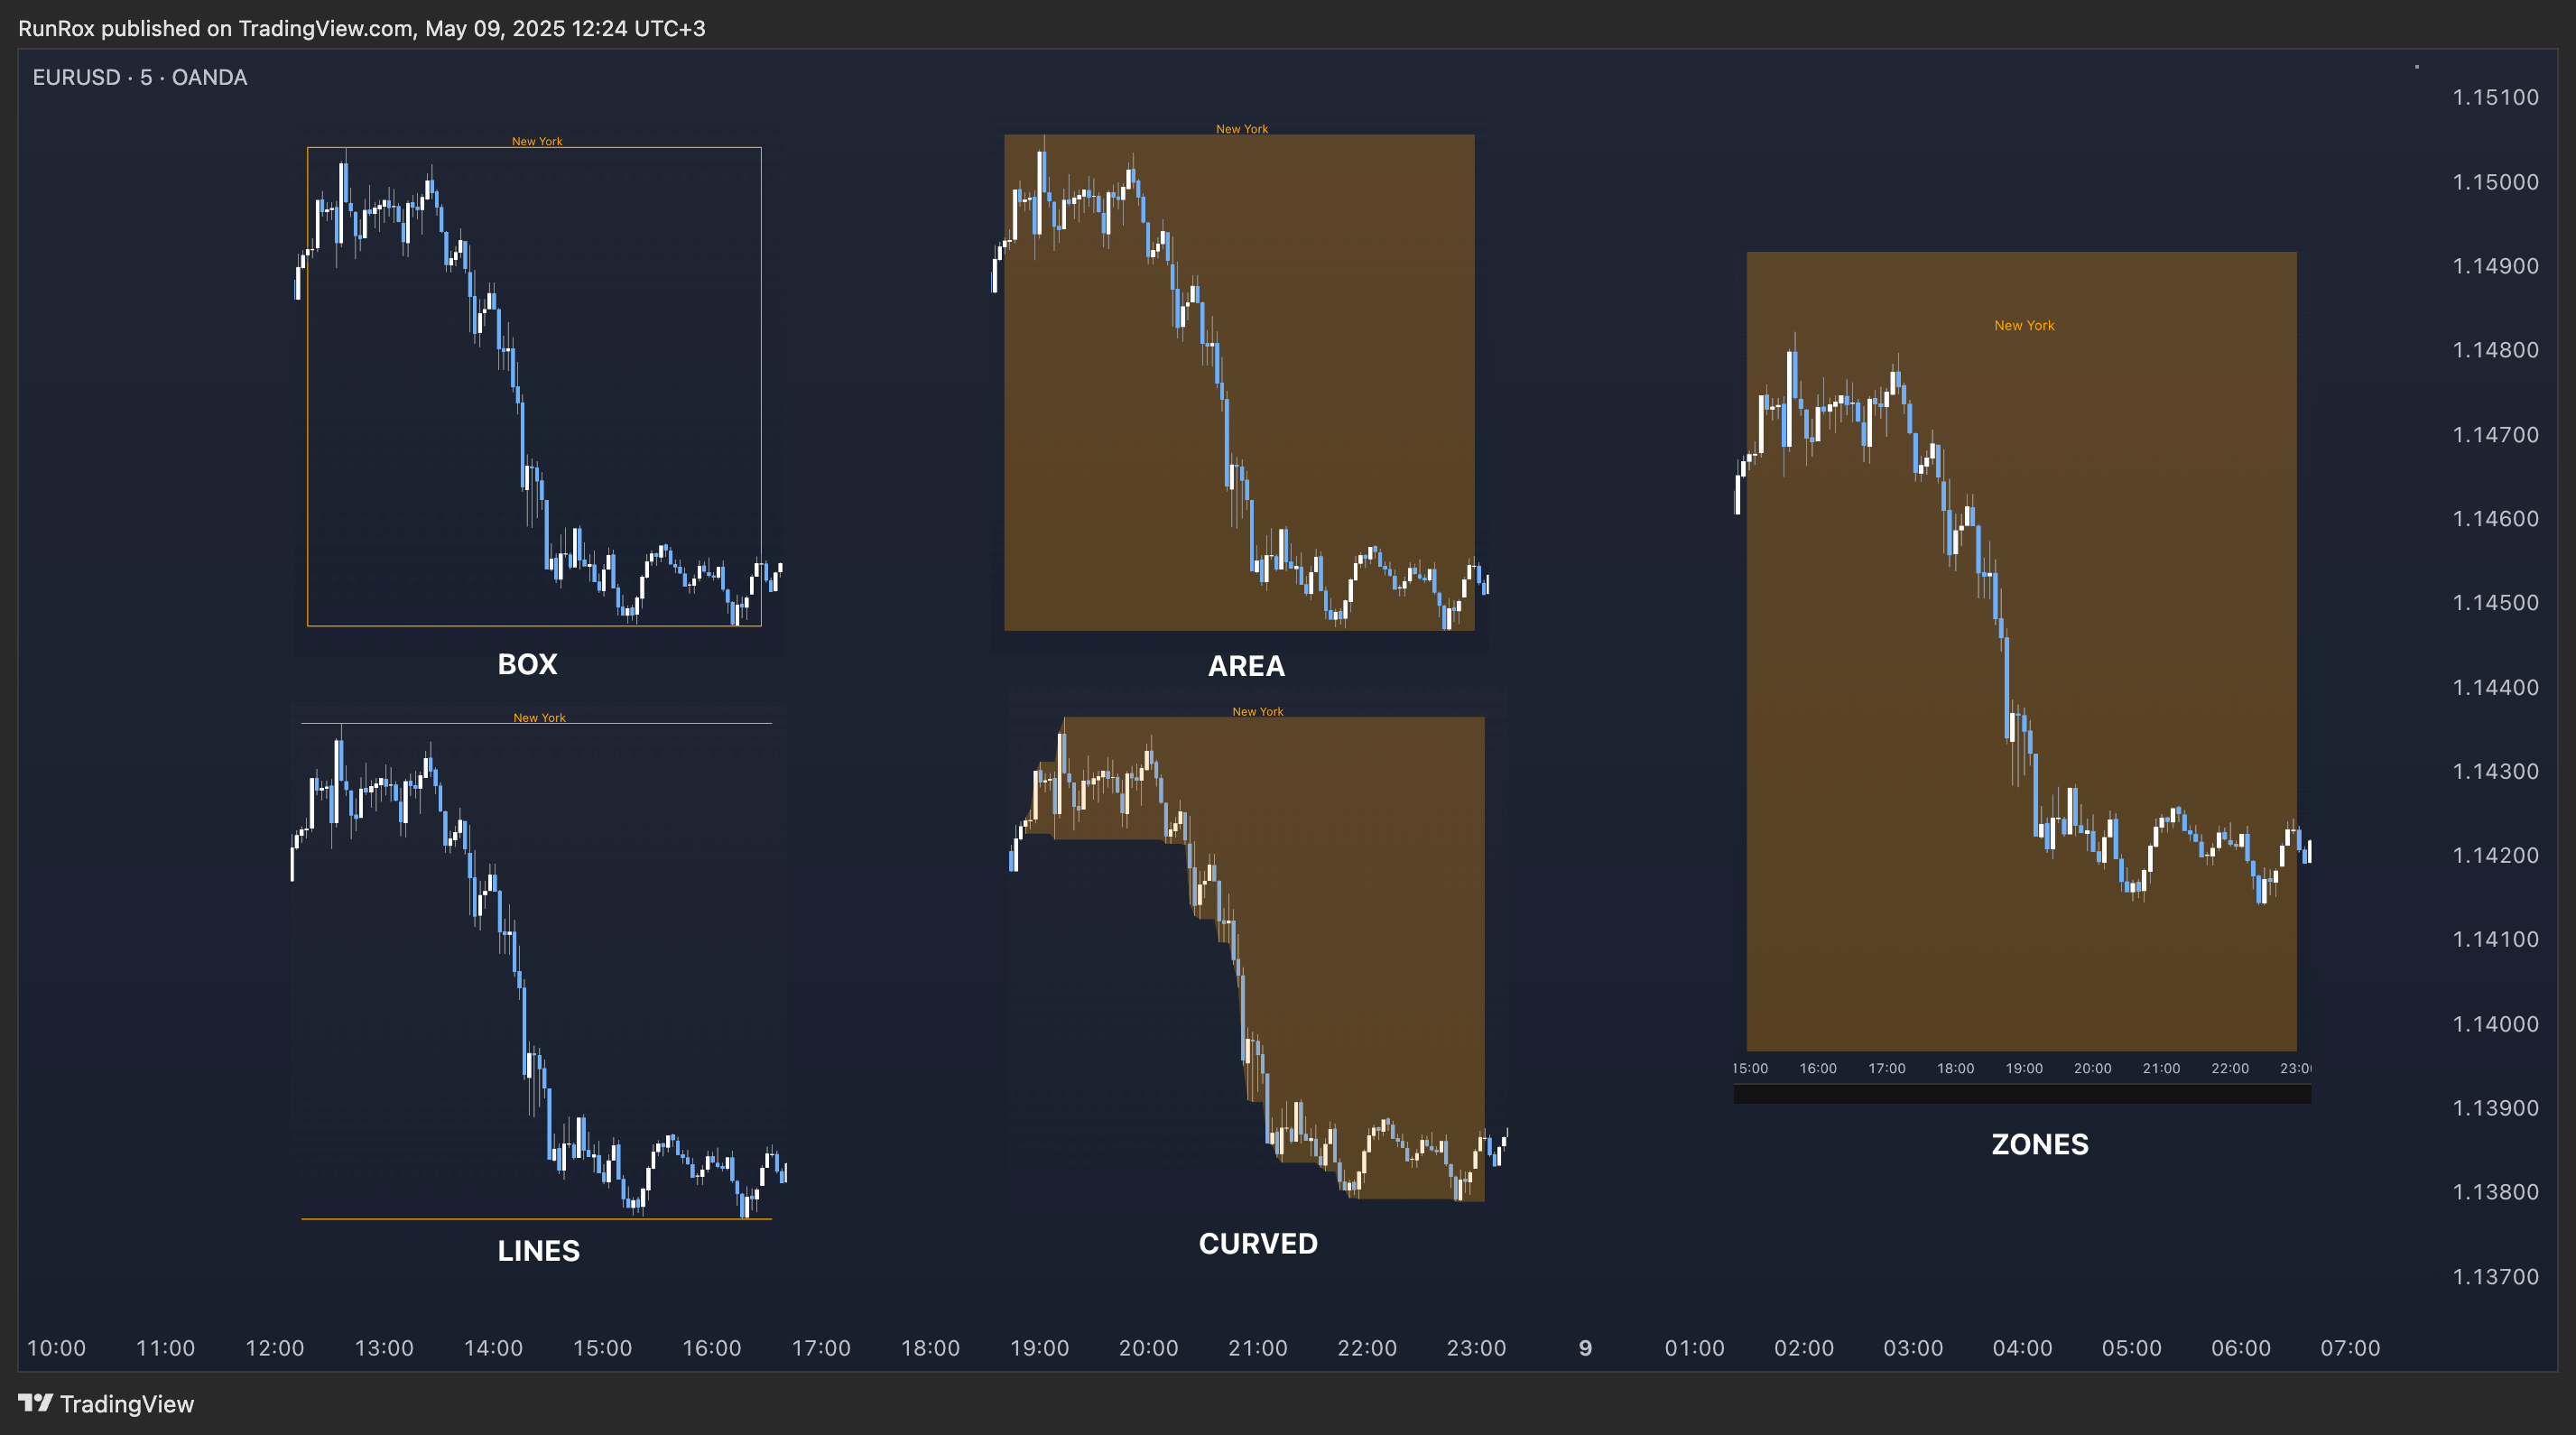
The indicator includes six sessions that you can fully customize to fit your needs—everything from naming each session and choosing line colors to adjusting opacity, showing the volume profile, or even turning off a session entirely if you don’t need it.
Plus, you can pick different display styles for each session. As shown in the screenshot below, there are five style options you can apply individually to every session.
5 Style Options for Sessions
- BOX
- AREA
- ZONES
- LINES
- CURVED
📢 VOLUME PROFILE
We’ve also integrated a Volume Profile into the indicator to pinpoint important levels on the chart. On top of that, we’ve added extra volume-based levels. Below, you’ll find the settings and a visual demo of how it appears on your chart.
To identify optimal entry points, you can use the following key reference levels:
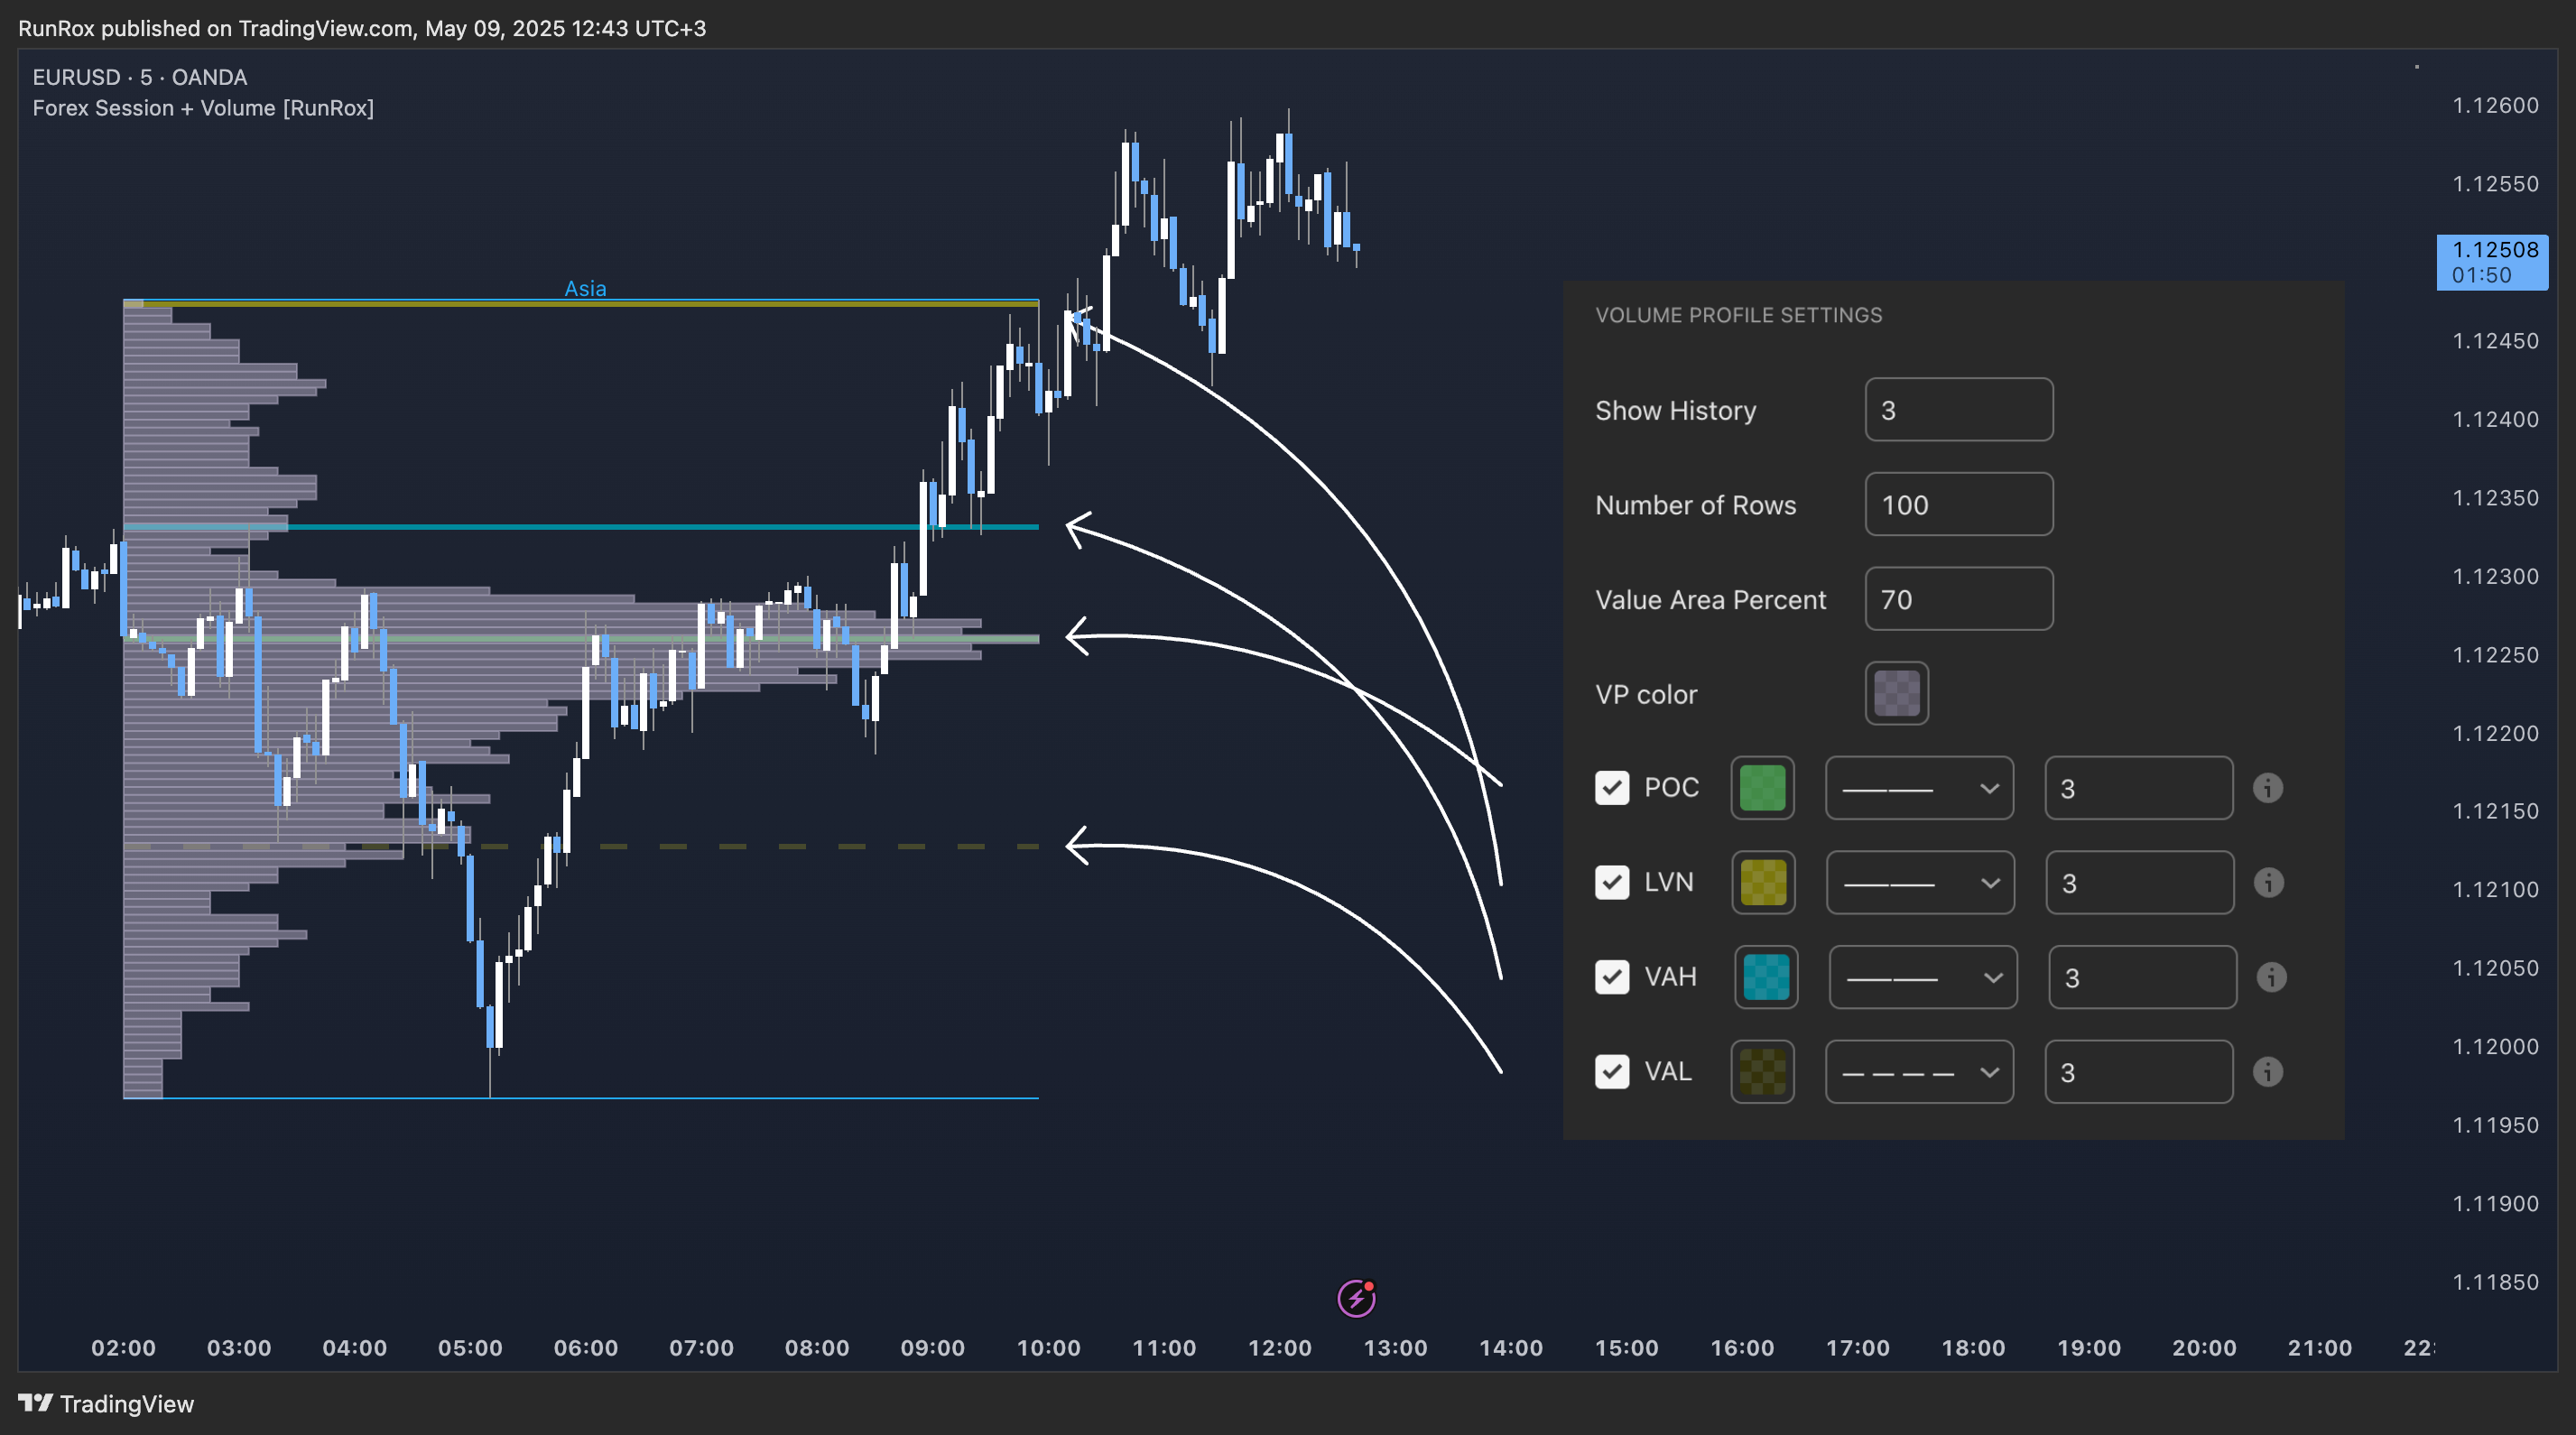
- POC (Point of Control)
- VAL (Value Area Low)
- VAH (Value Area High)
- LVN (Low Volume Node)


