🔶 Detection Settings
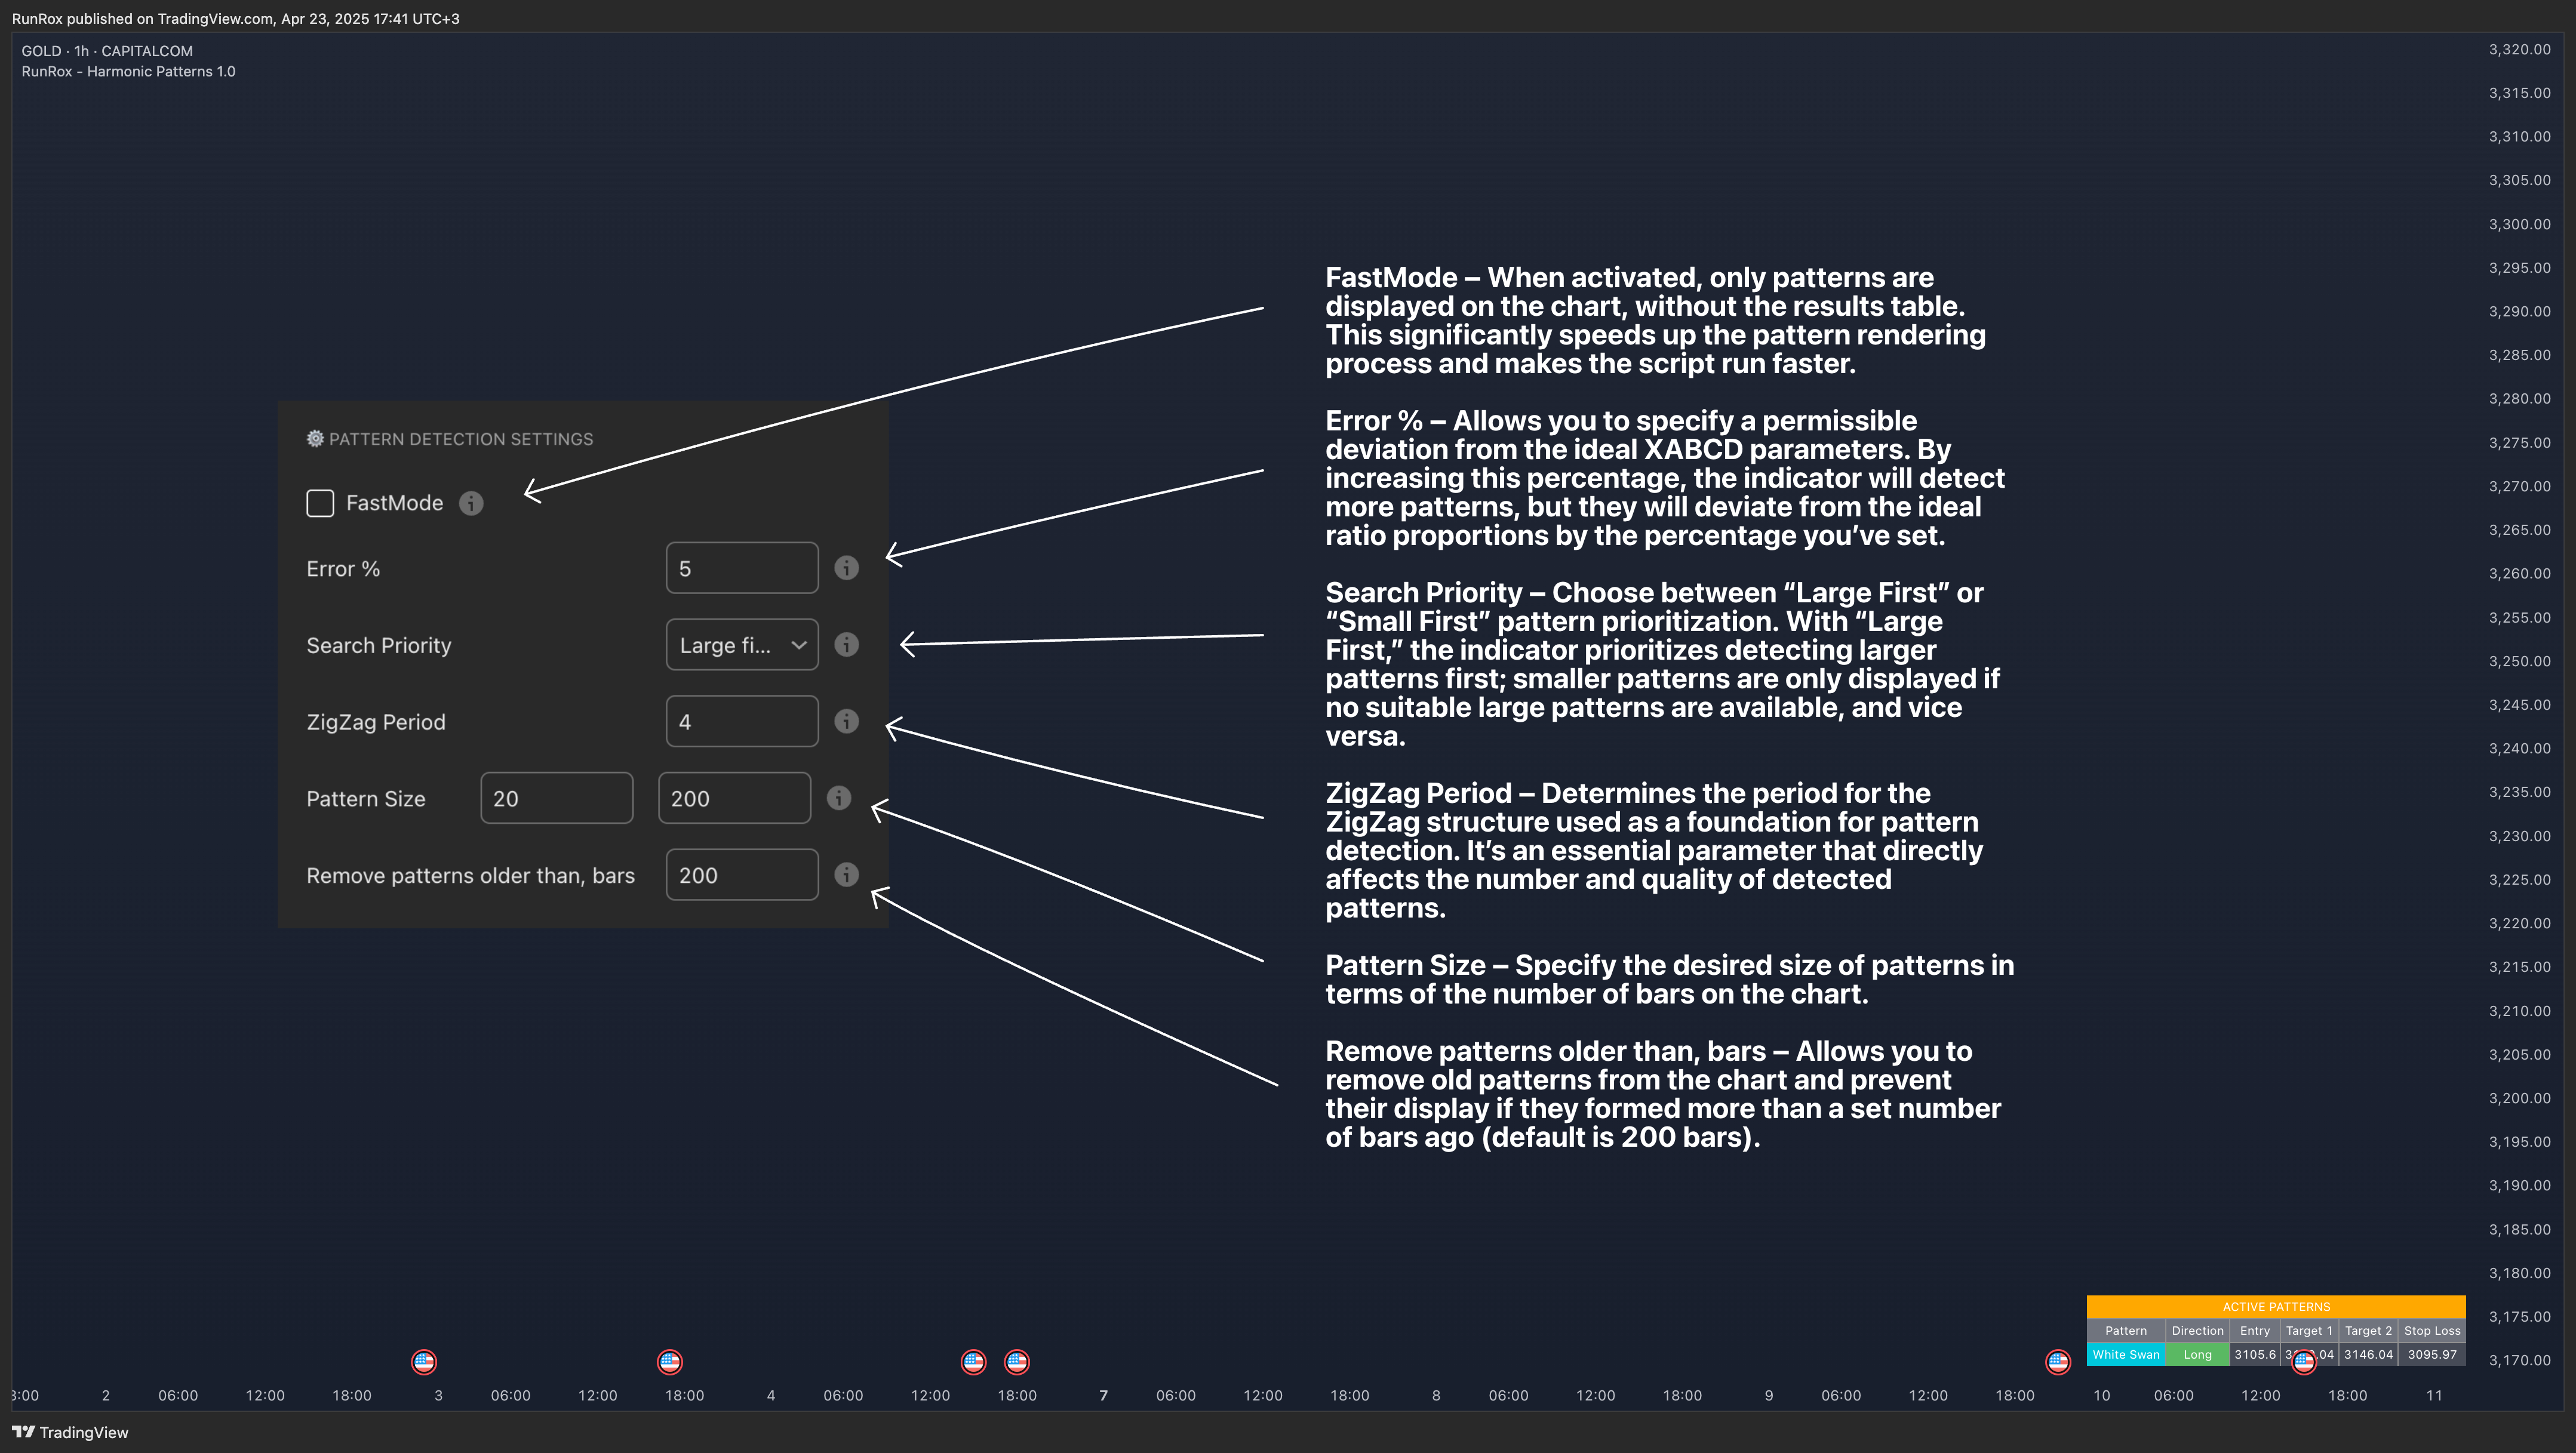
- FastMode – When activated, only patterns are displayed on the chart, without the results table. This significantly speeds up the pattern rendering process and makes the script run faster.
- Error % – Allows you to specify a permissible deviation from the ideal XABCD parameters. By increasing this percentage, the indicator will detect more patterns, but they will deviate from the ideal ratio proportions by the percentage you’ve set.
- Search Priority – Choose between “Large First” or “Small First” pattern prioritization. With “Large First,” the indicator prioritizes detecting larger patterns first; smaller patterns are only displayed if no suitable large patterns are available, and vice versa.
- ZigZag Period – Determines the period for the ZigZag structure used as a foundation for pattern detection. It’s an essential parameter that directly affects the number and quality of detected patterns.
- Pattern Size – Specify the desired size of patterns in terms of the number of bars on the chart.
- Remove patterns older than, bars – Allows you to remove old patterns from the chart and prevent their display if they formed more than a set number of bars ago (default is 200 bars).
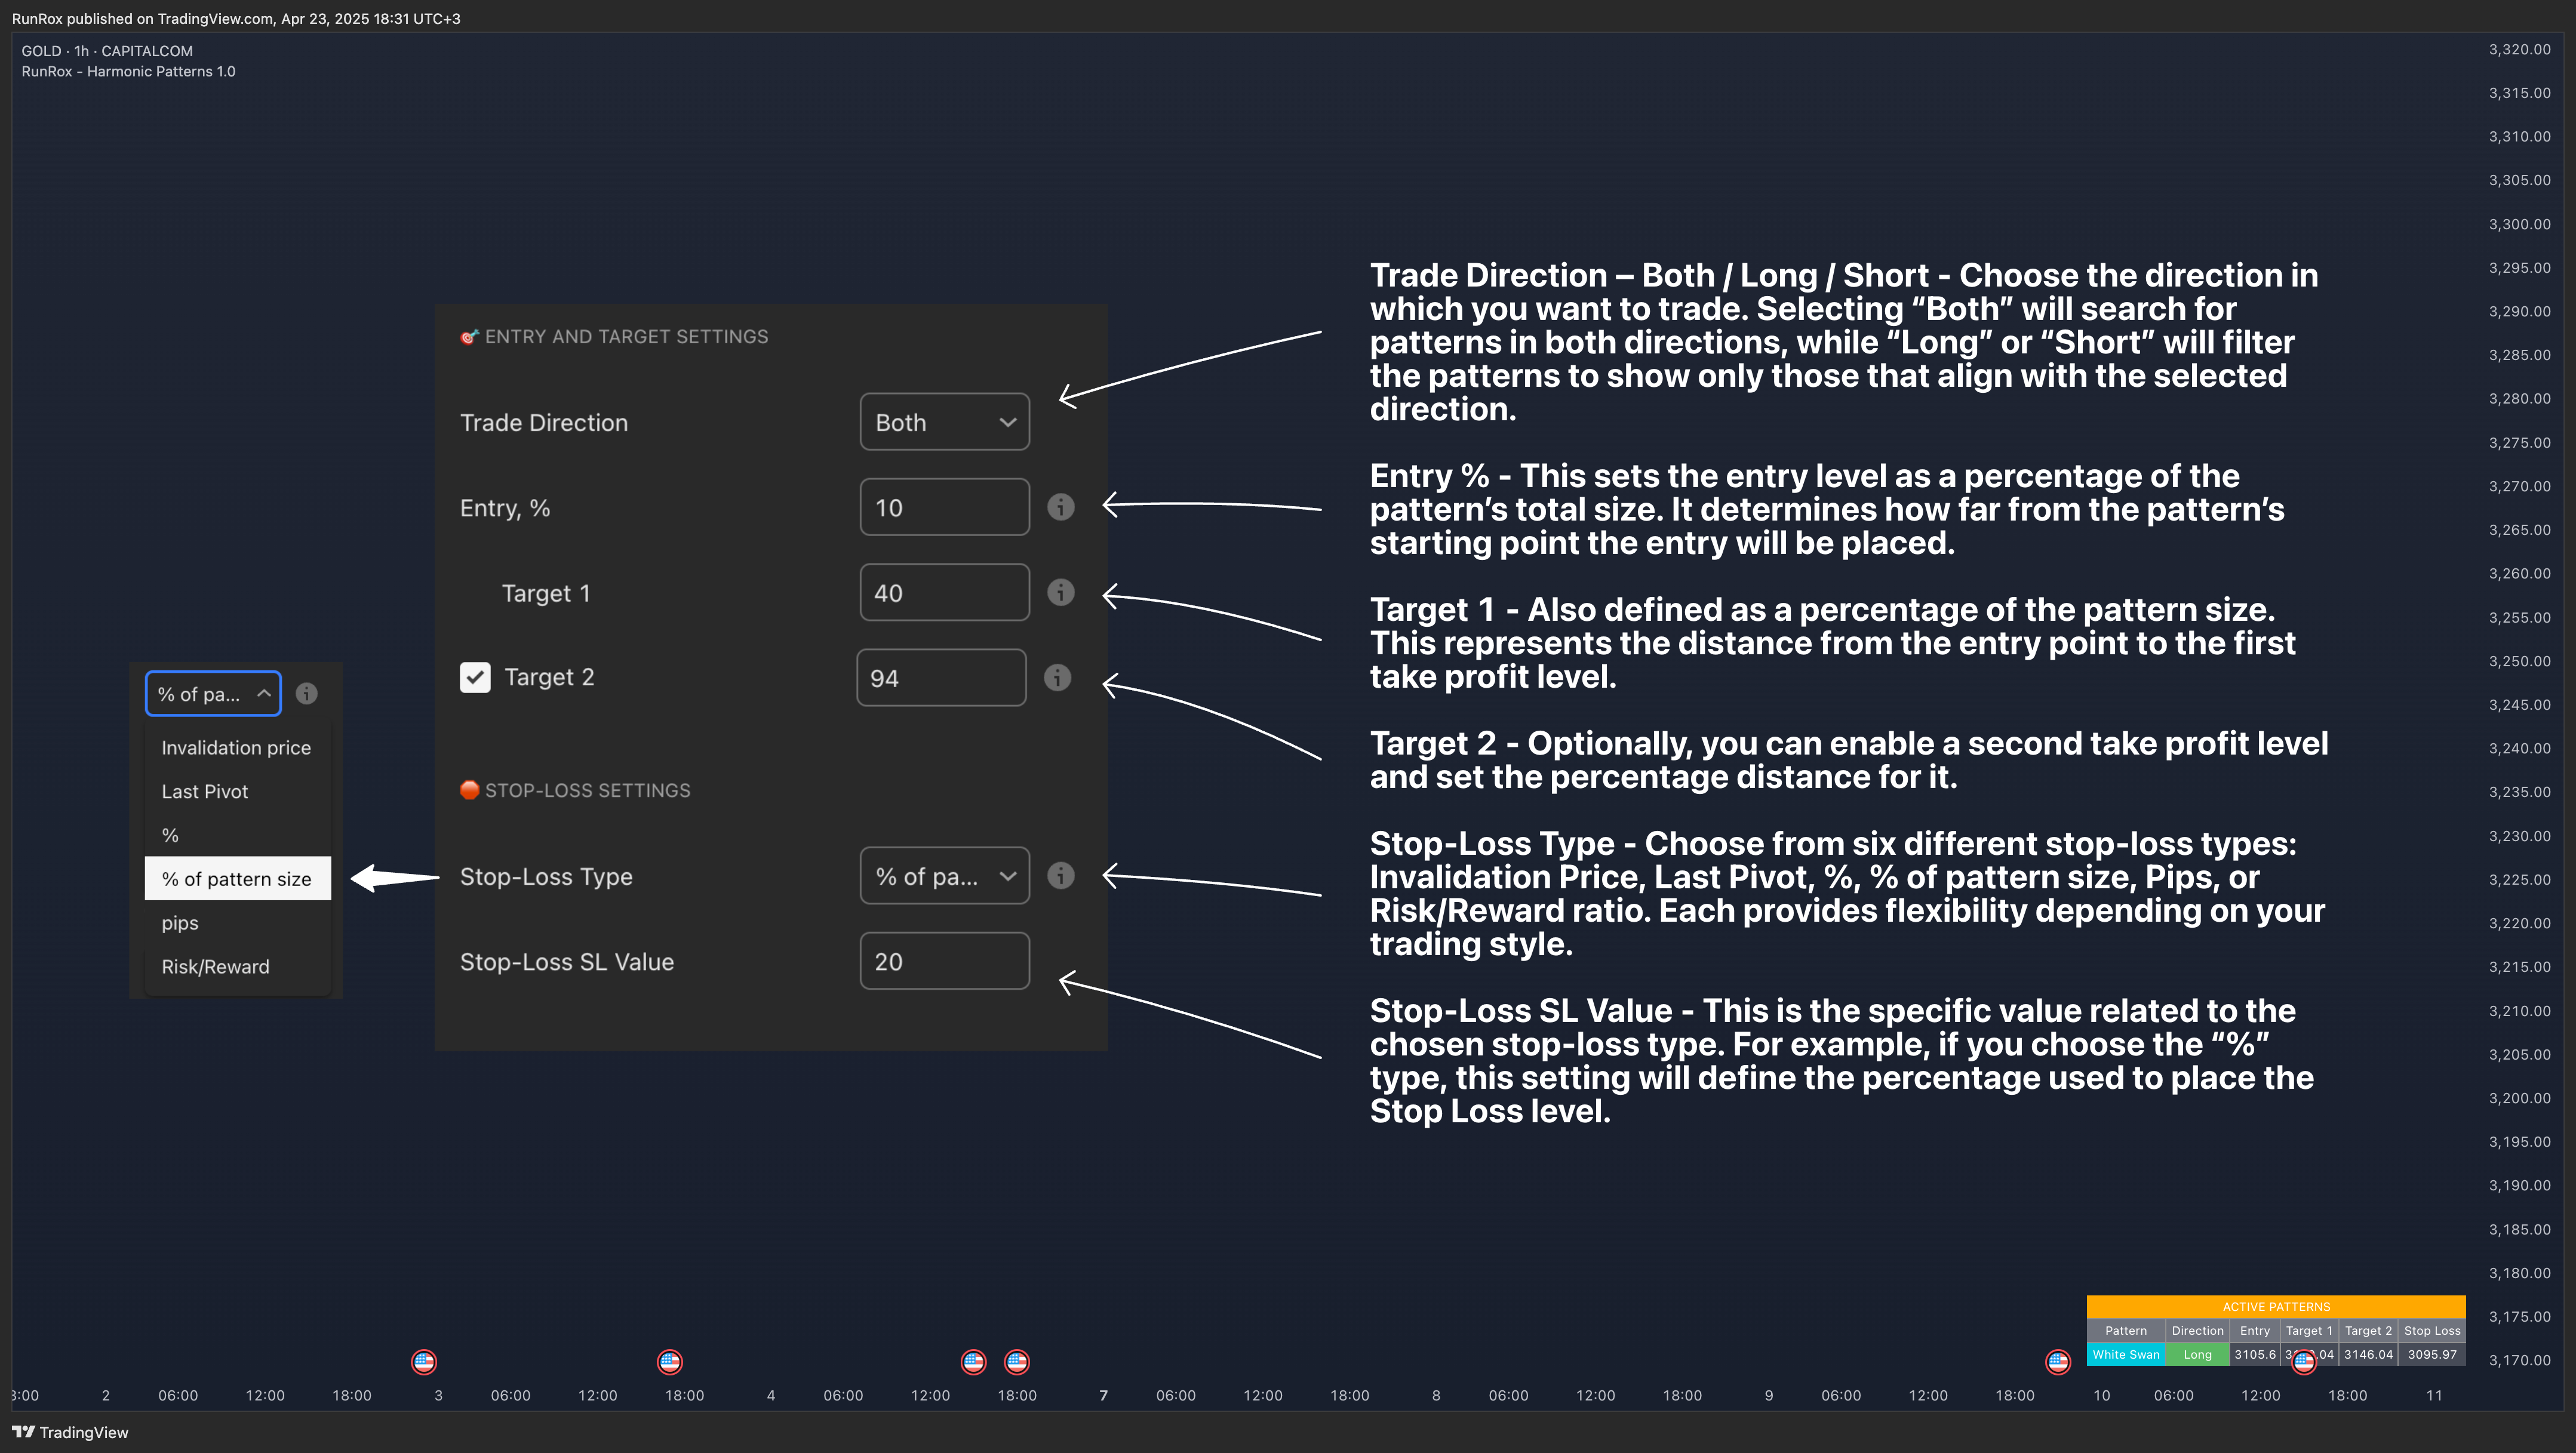
- Trade Direction – Both / Long / Short - Choose the direction in which you want to trade. Selecting “Both” will search for patterns in both directions, while “Long” or “Short” will filter the patterns to show only those that align with the selected direction.
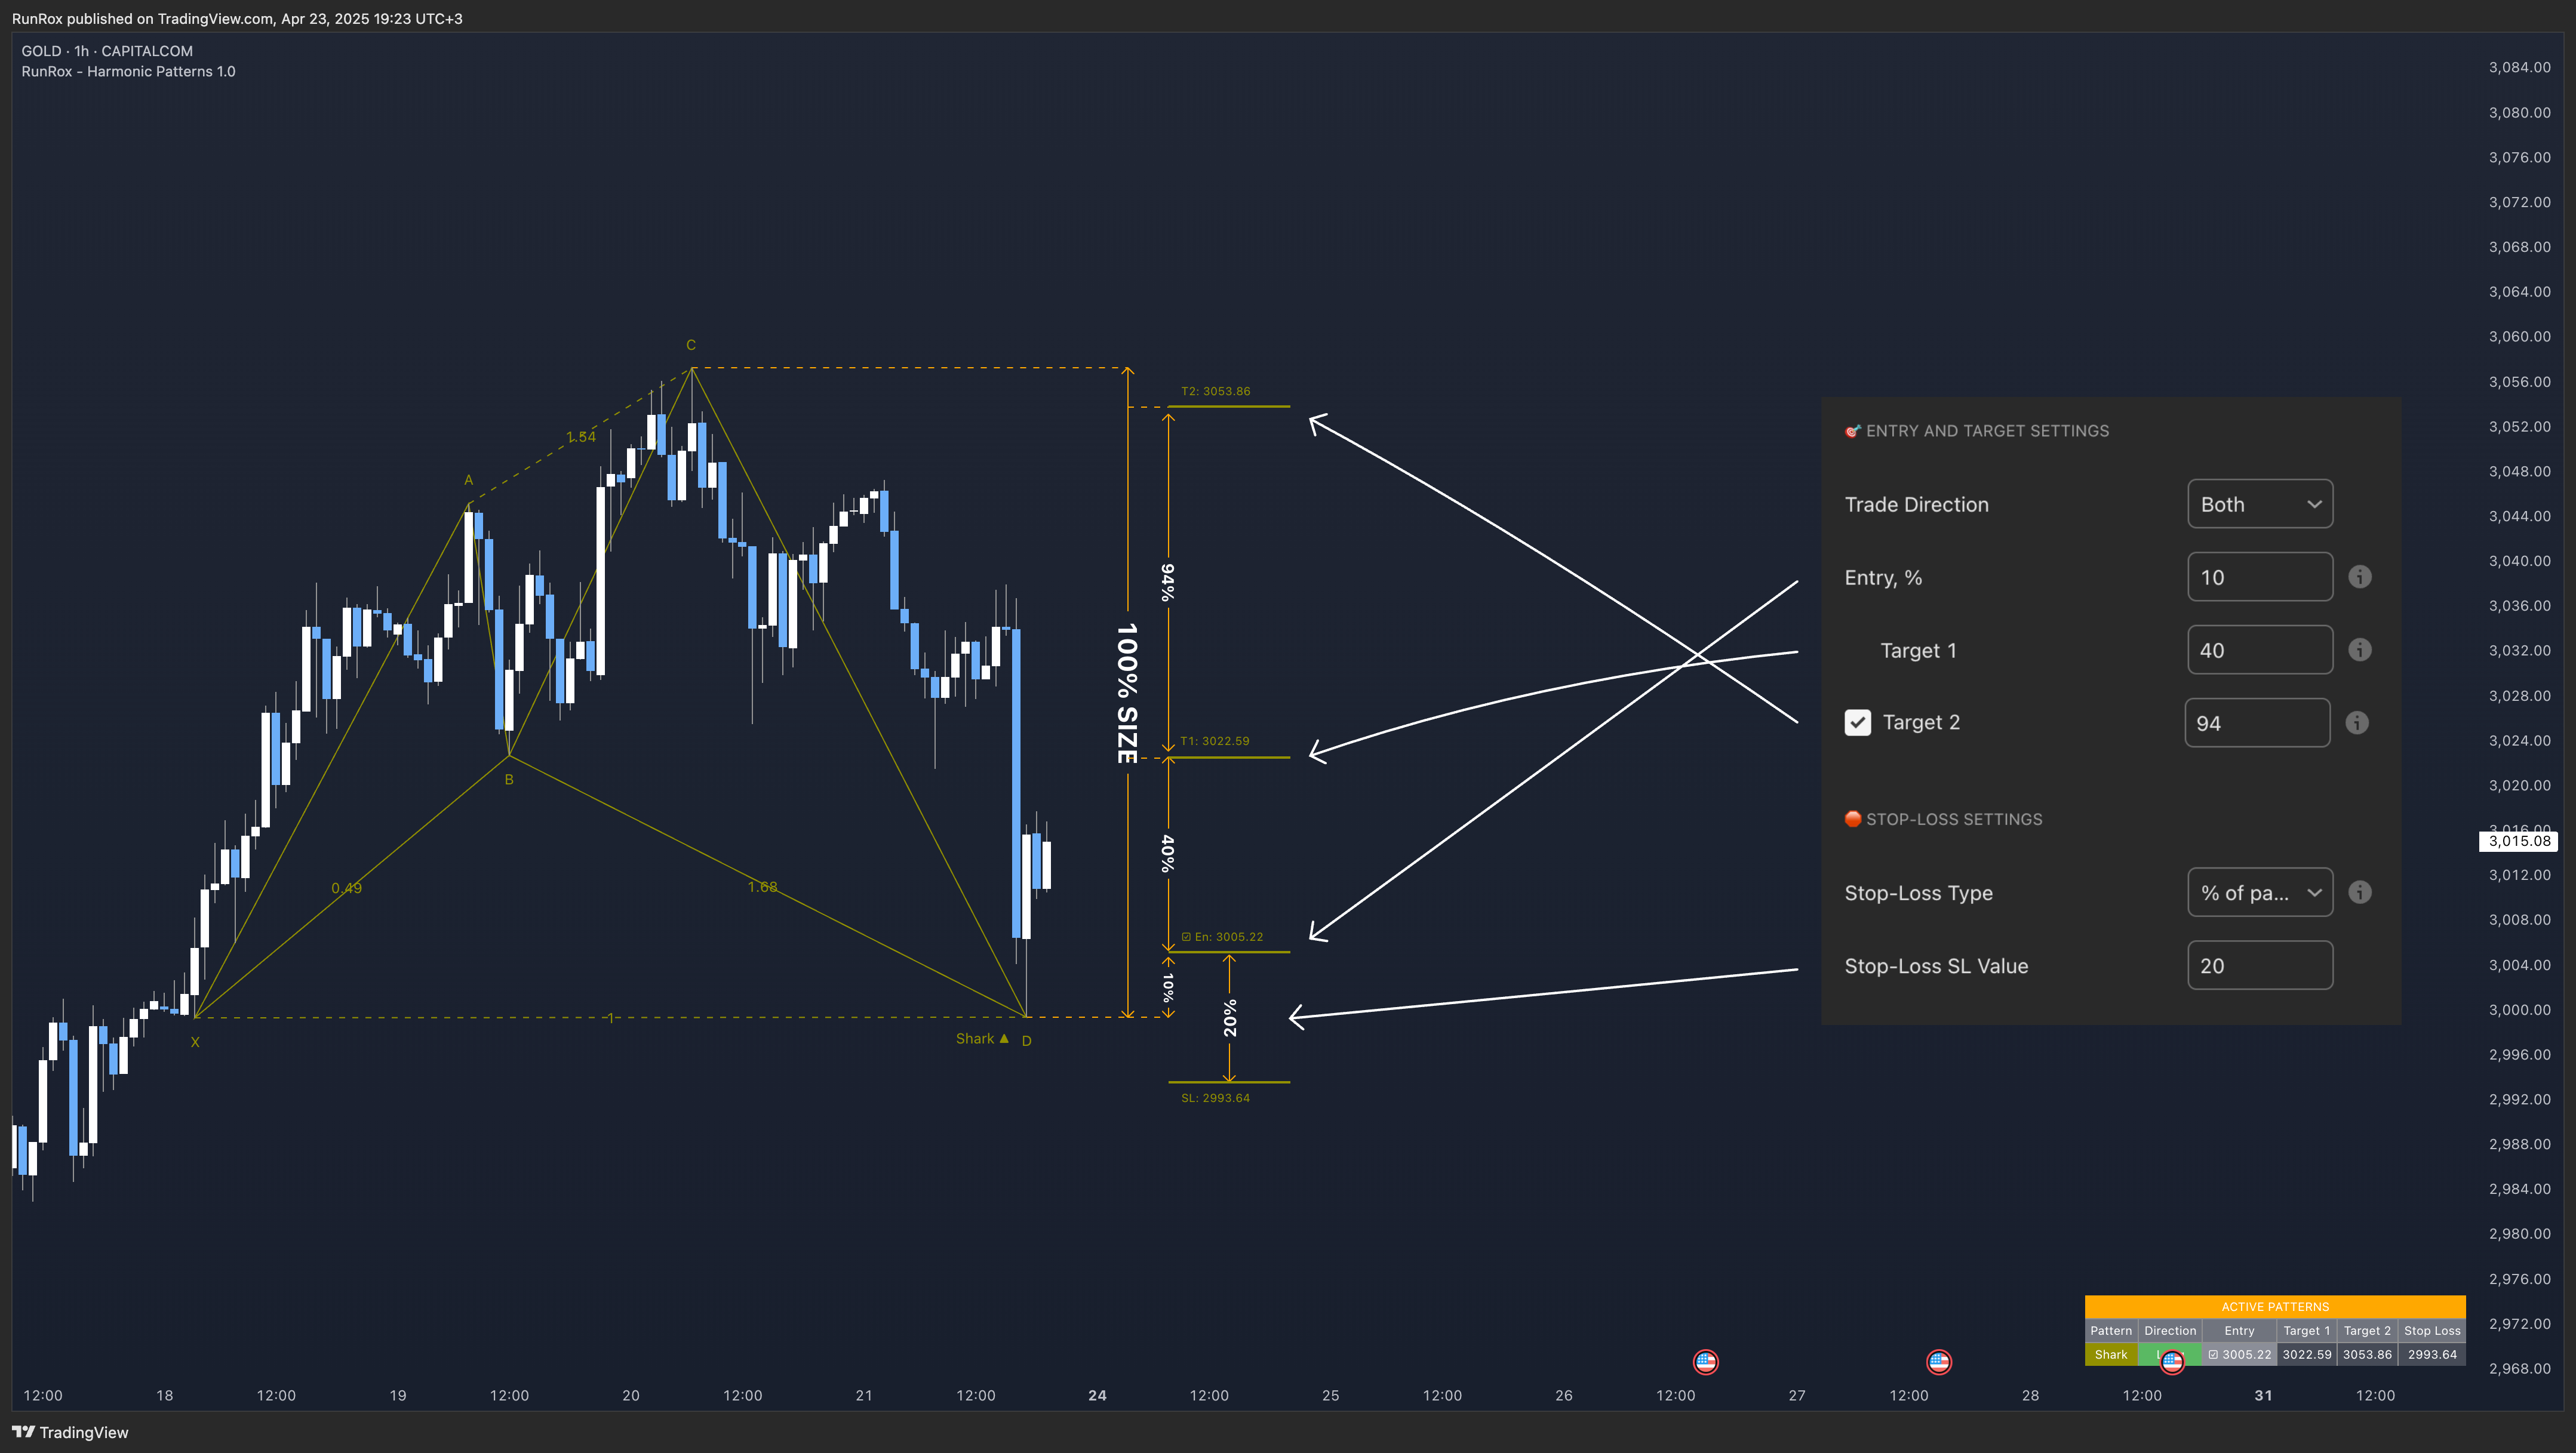
- Entry % - This sets the entry level as a percentage of the pattern’s total size. It determines how far from the pattern’s starting point the entry will be placed.
- Target 1 - Also defined as a percentage of the pattern size. This represents the distance from the entry point to the first take profit level.
- Target 2 - Optionally, you can enable a second take profit level and set the percentage distance for it.
- Stop-Loss Type - Choose from six different stop-loss types: Invalidation Price, Last Pivot, %, % of pattern size, Pips, or Risk/Reward ratio. Each provides flexibility depending on your trading style.
- Stop-Loss SL Value - This is the specific value related to the chosen stop-loss type. For example, if you choose the “%” type, this setting will define the percentage used to place the Stop Loss level.
You can also choose alternative stop-loss methods, such as Risk/Reward, in which case the stop-loss will be dynamically calculated based on the risk-to-reward ratio you define.
It’s also important to note that for harmonic patterns, the height of the pattern is calculated based on the segment from point C to point D. However, for the Black Swan pattern, the measurement is taken from point A to point D. This distinction should be kept in mind when configuring your stop-loss levels.
Additionally, classic patterns each have their own unique method for calculating pattern height, depending on the specific structure. 🔶 Trailing Stop Settings
These settings are designed to help improve your strategy’s results, especially if you use break-even stop-loss adjustments after reaching specific targets, which can help increase your win rate.
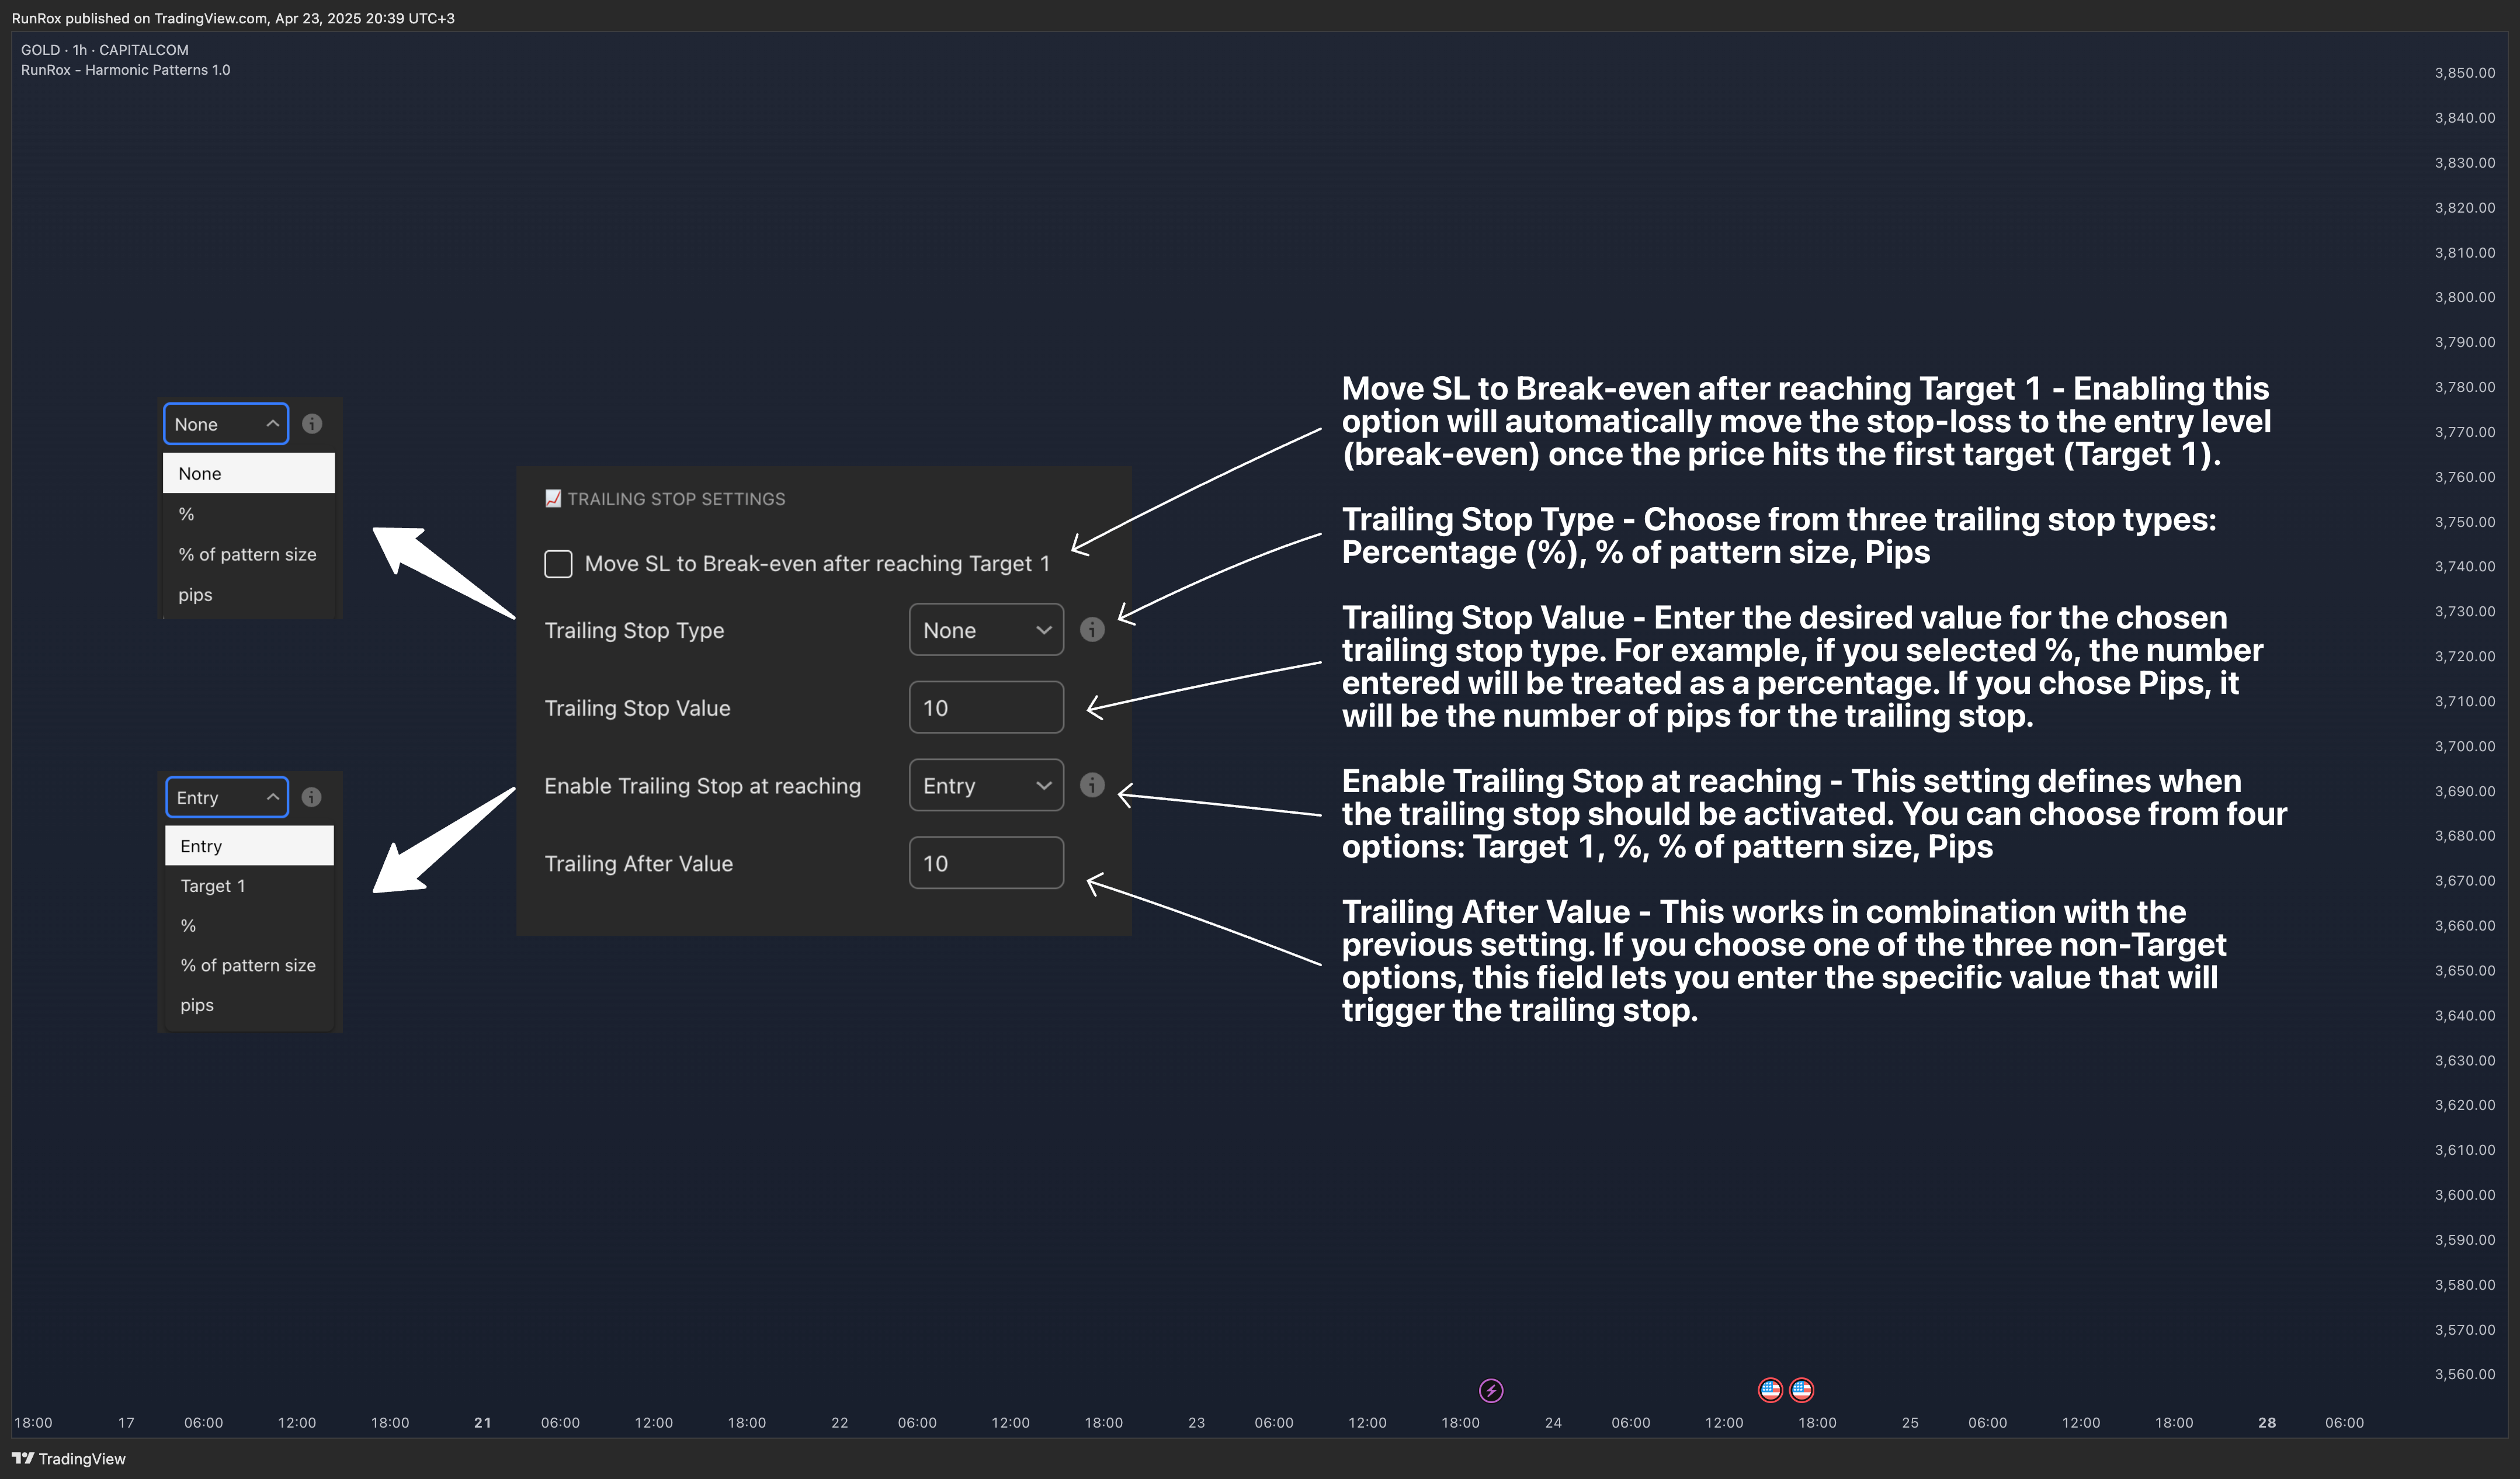
- Move SL to Break-even after reaching Target 1 - Enabling this option will automatically move the stop-loss to the entry level (break-even) once the price hits the first target (Target 1).
- Trailing Stop Type - Choose from three trailing stop types: Percentage (%), % of pattern size, Pips
- Trailing Stop Value - Enter the desired value for the chosen trailing stop type. For example, if you selected %, the number entered will be treated as a percentage. If you chose Pips, it will be the number of pips for the trailing stop.
- Enable Trailing Stop at reaching - This setting defines when the trailing stop should be activated. You can choose from four options: Target 1, %, % of pattern size, Pips
- Trailing After Value - This works in combination with the previous setting. If you choose one of the three non-Target options, this field lets you enter the specific value that will trigger the trailing stop.
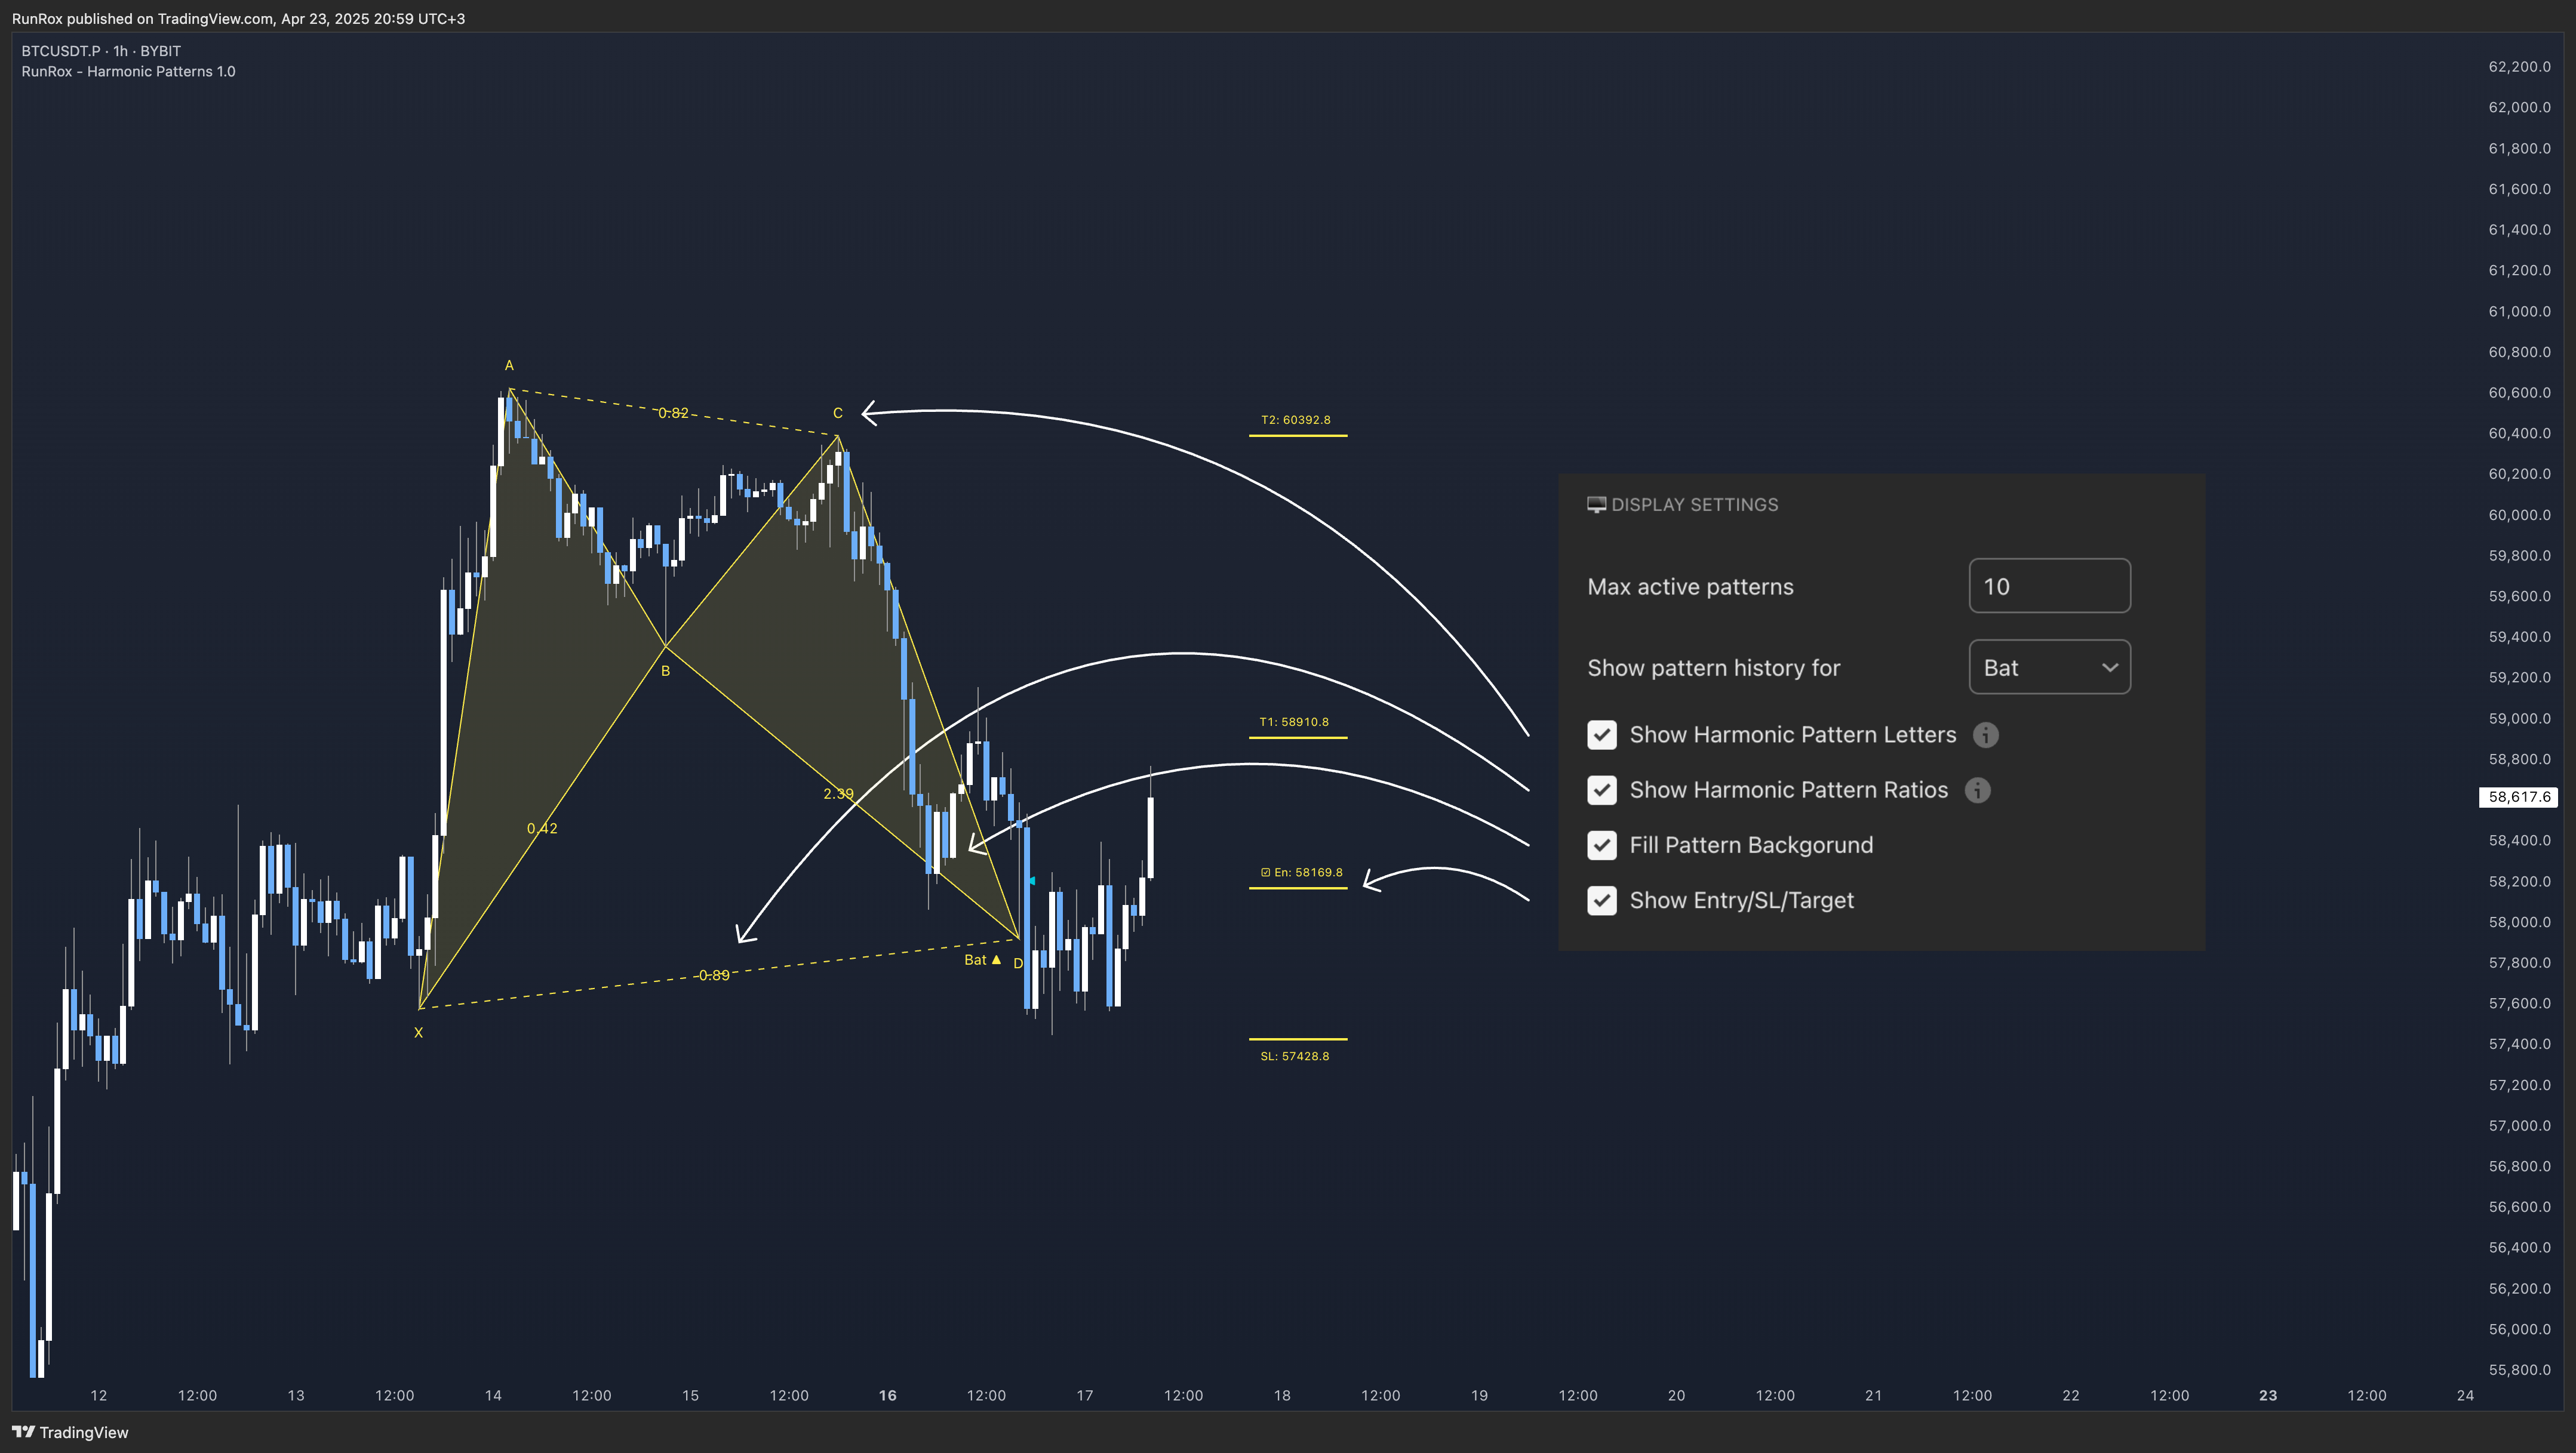
You can choose to show or hide pattern labels (XABCD), ratio values, entry/TP/SL levels, and pattern fill for better visual clarity.
Additionally, you can set the maximum number of active patterns displayed on the chart, as well as view the historical formations of any specific pattern to analyze how it appeared in past price action.
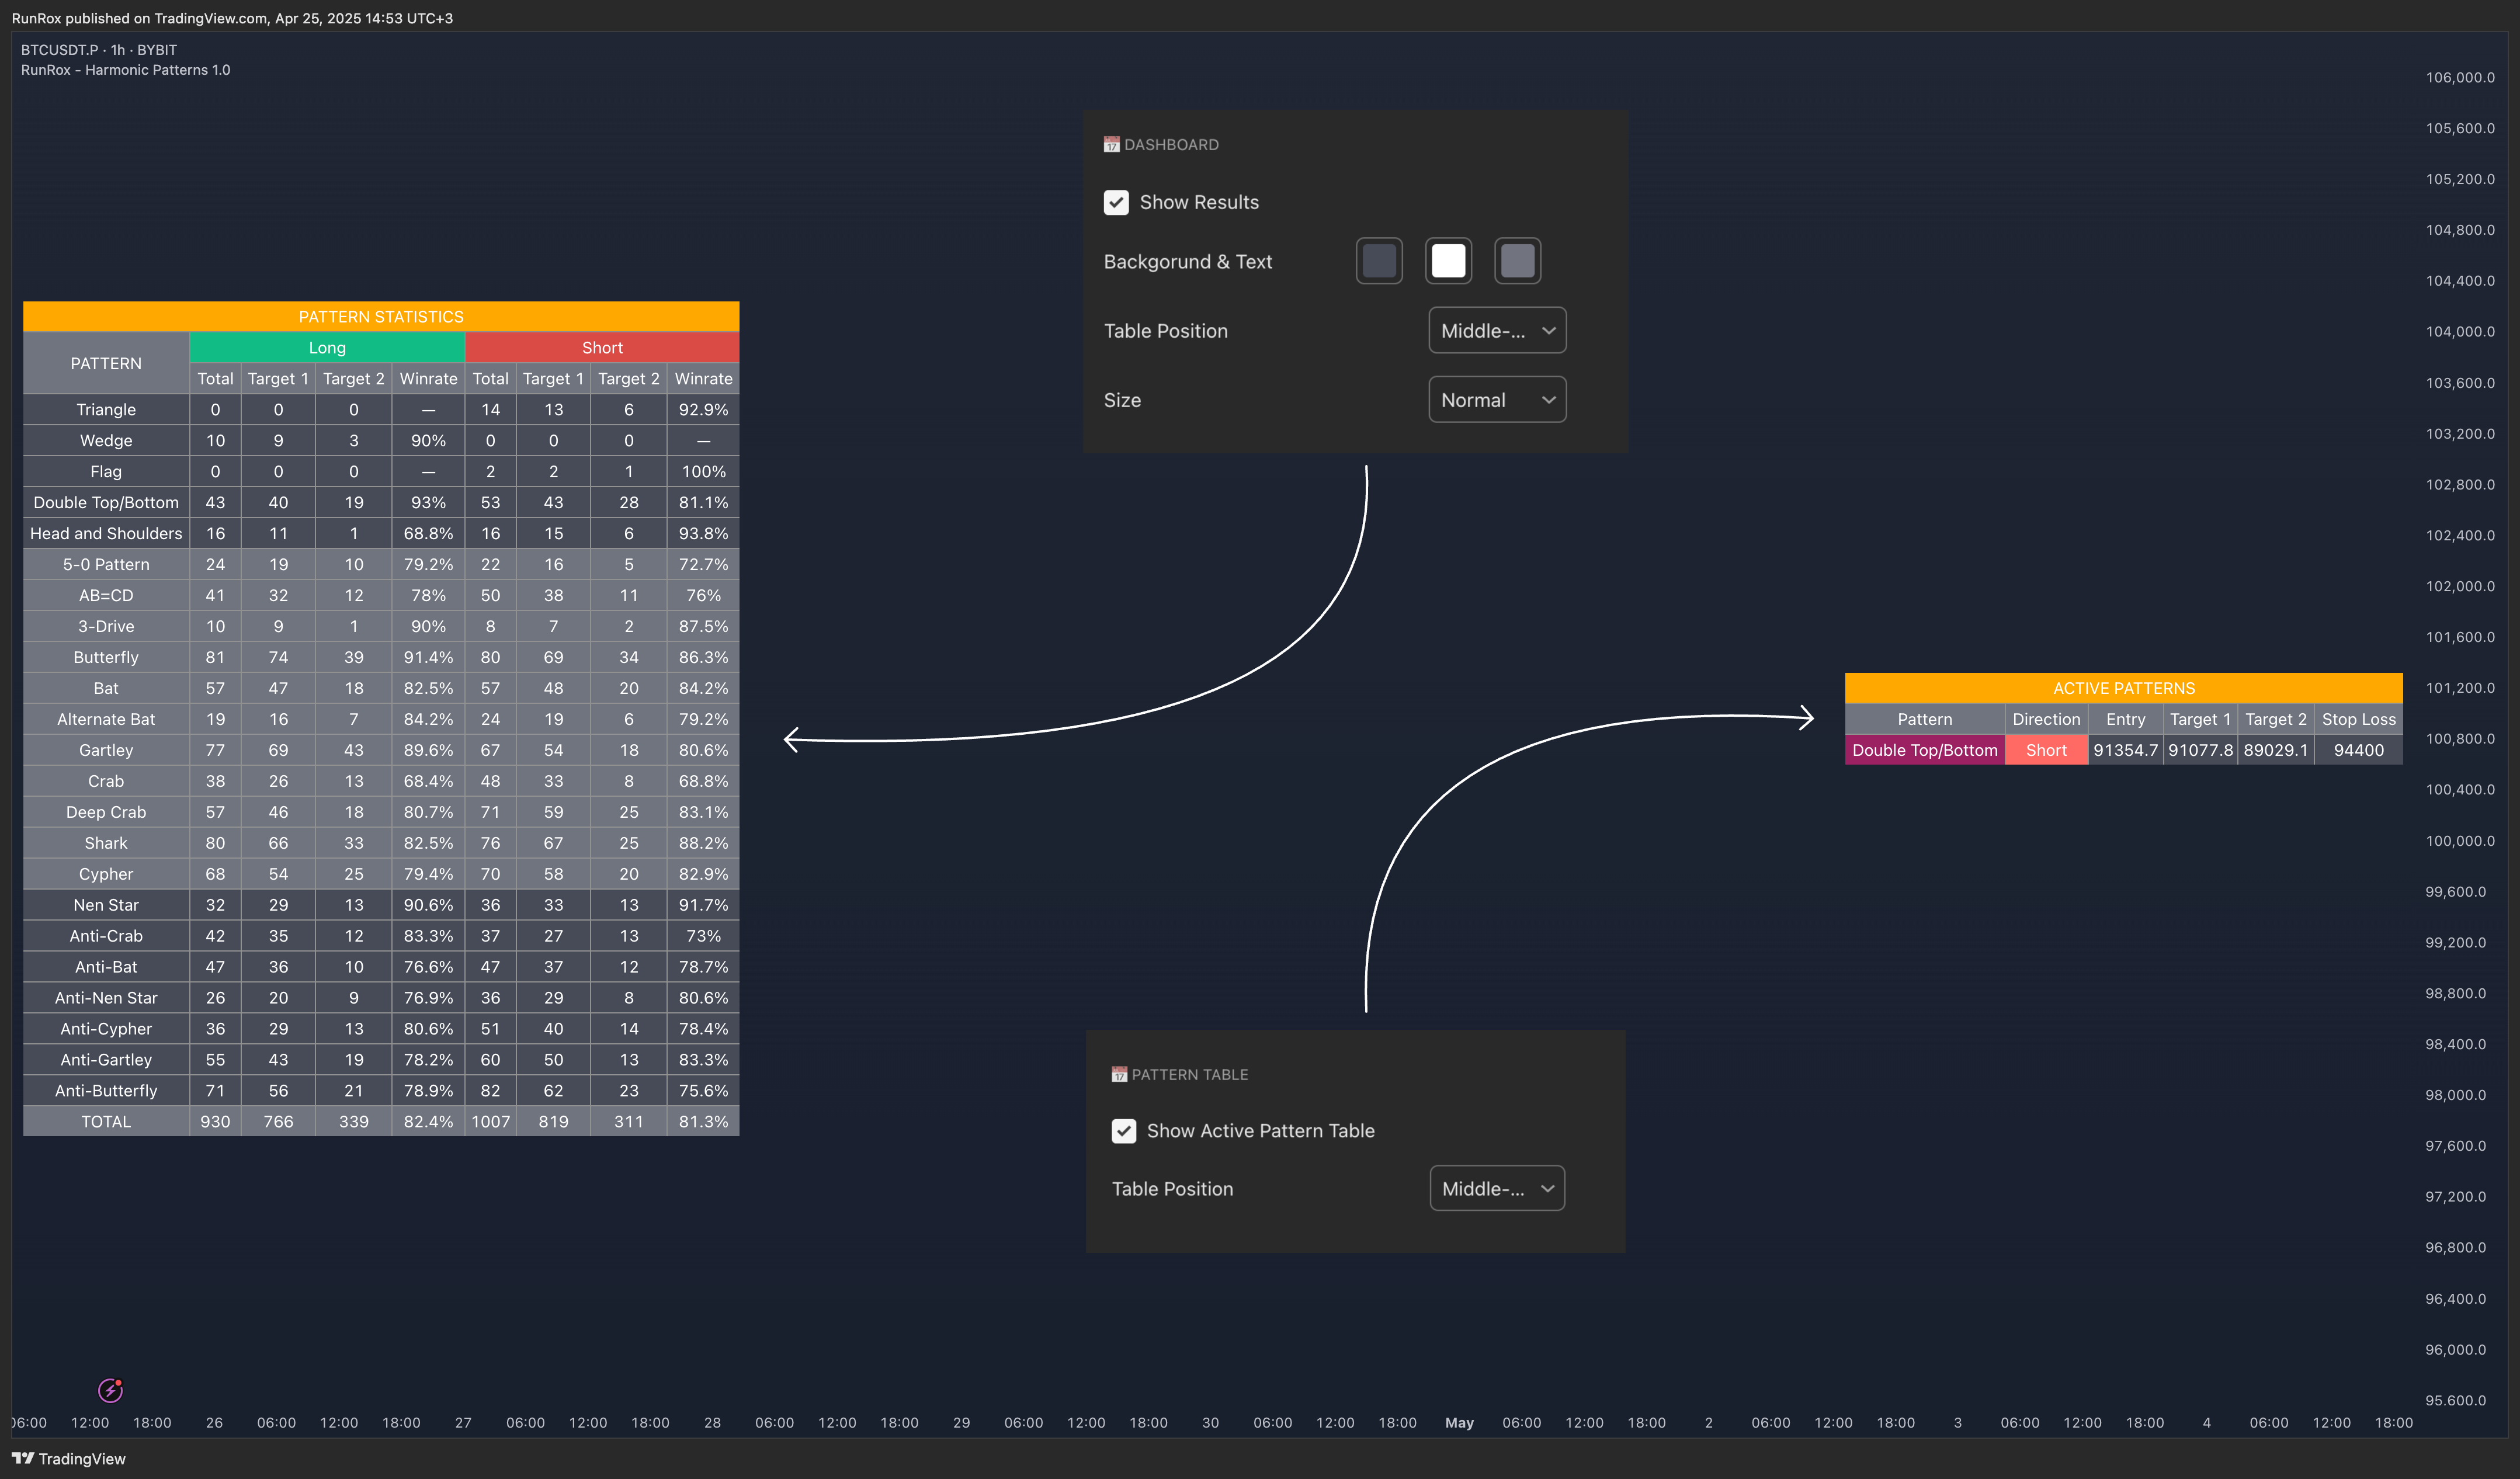
🔶 Dashboard | Pattern Table
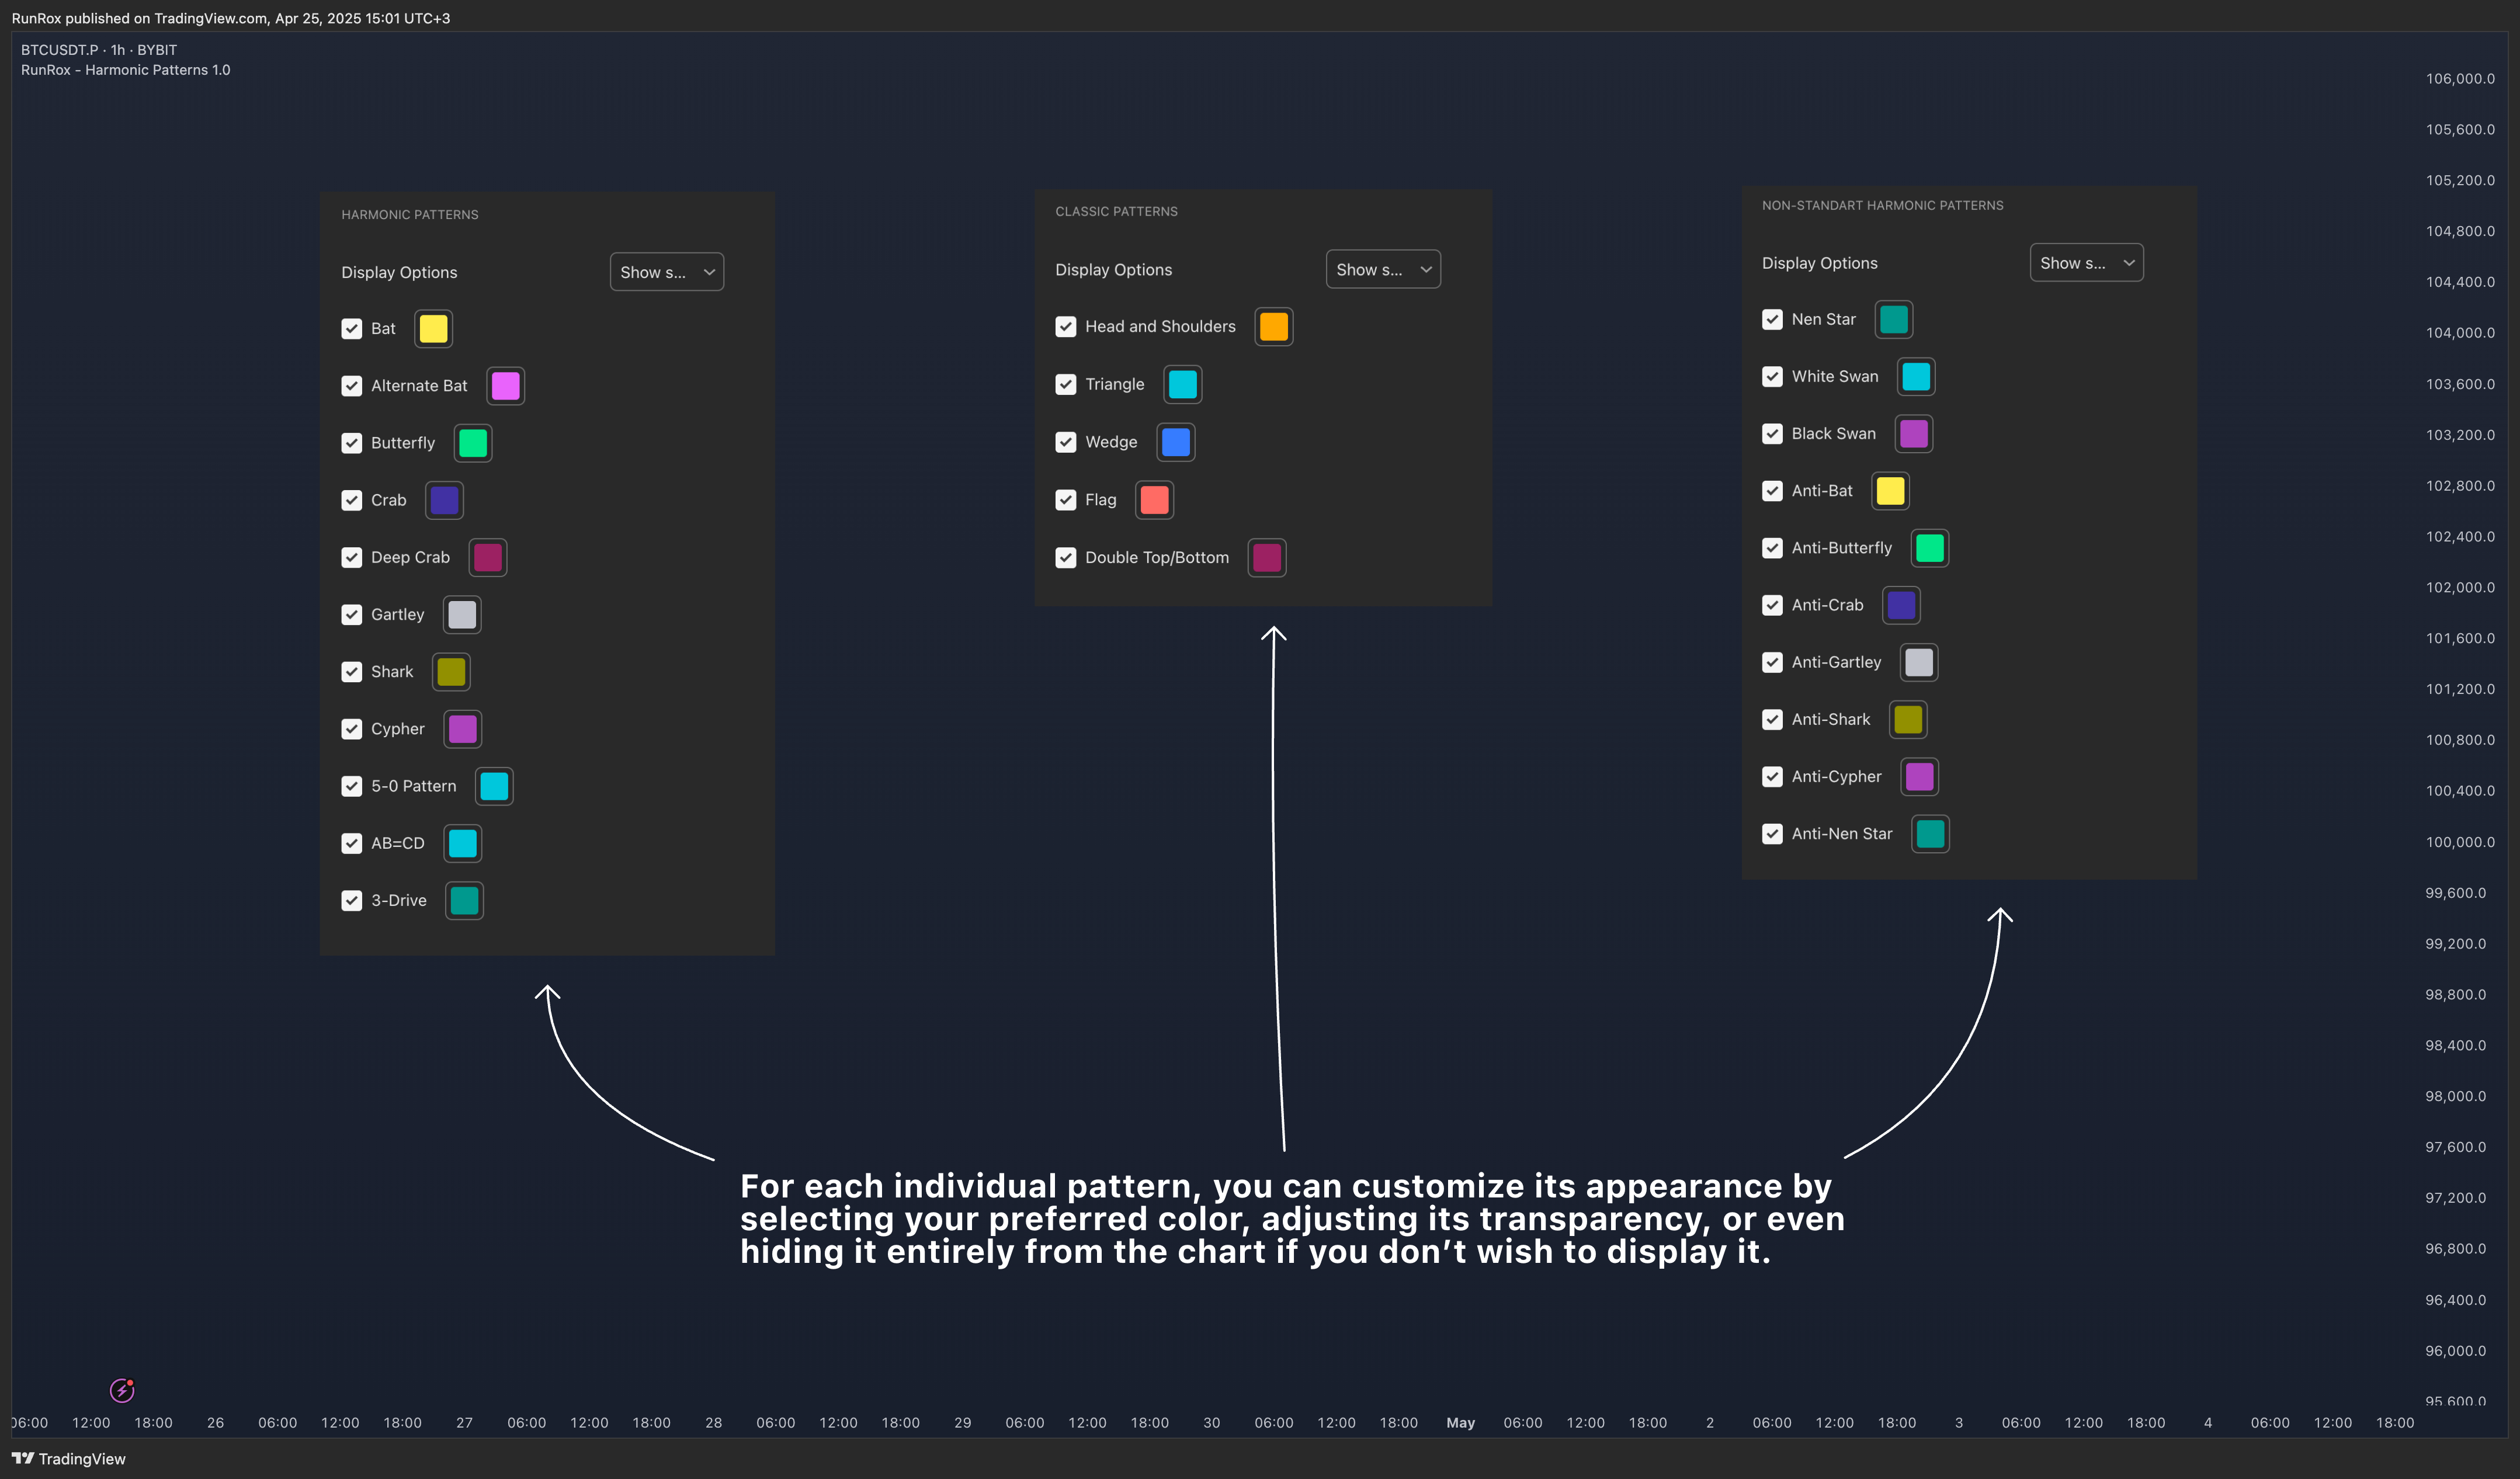
🔶 Patterns Setting
🔶 Notifications
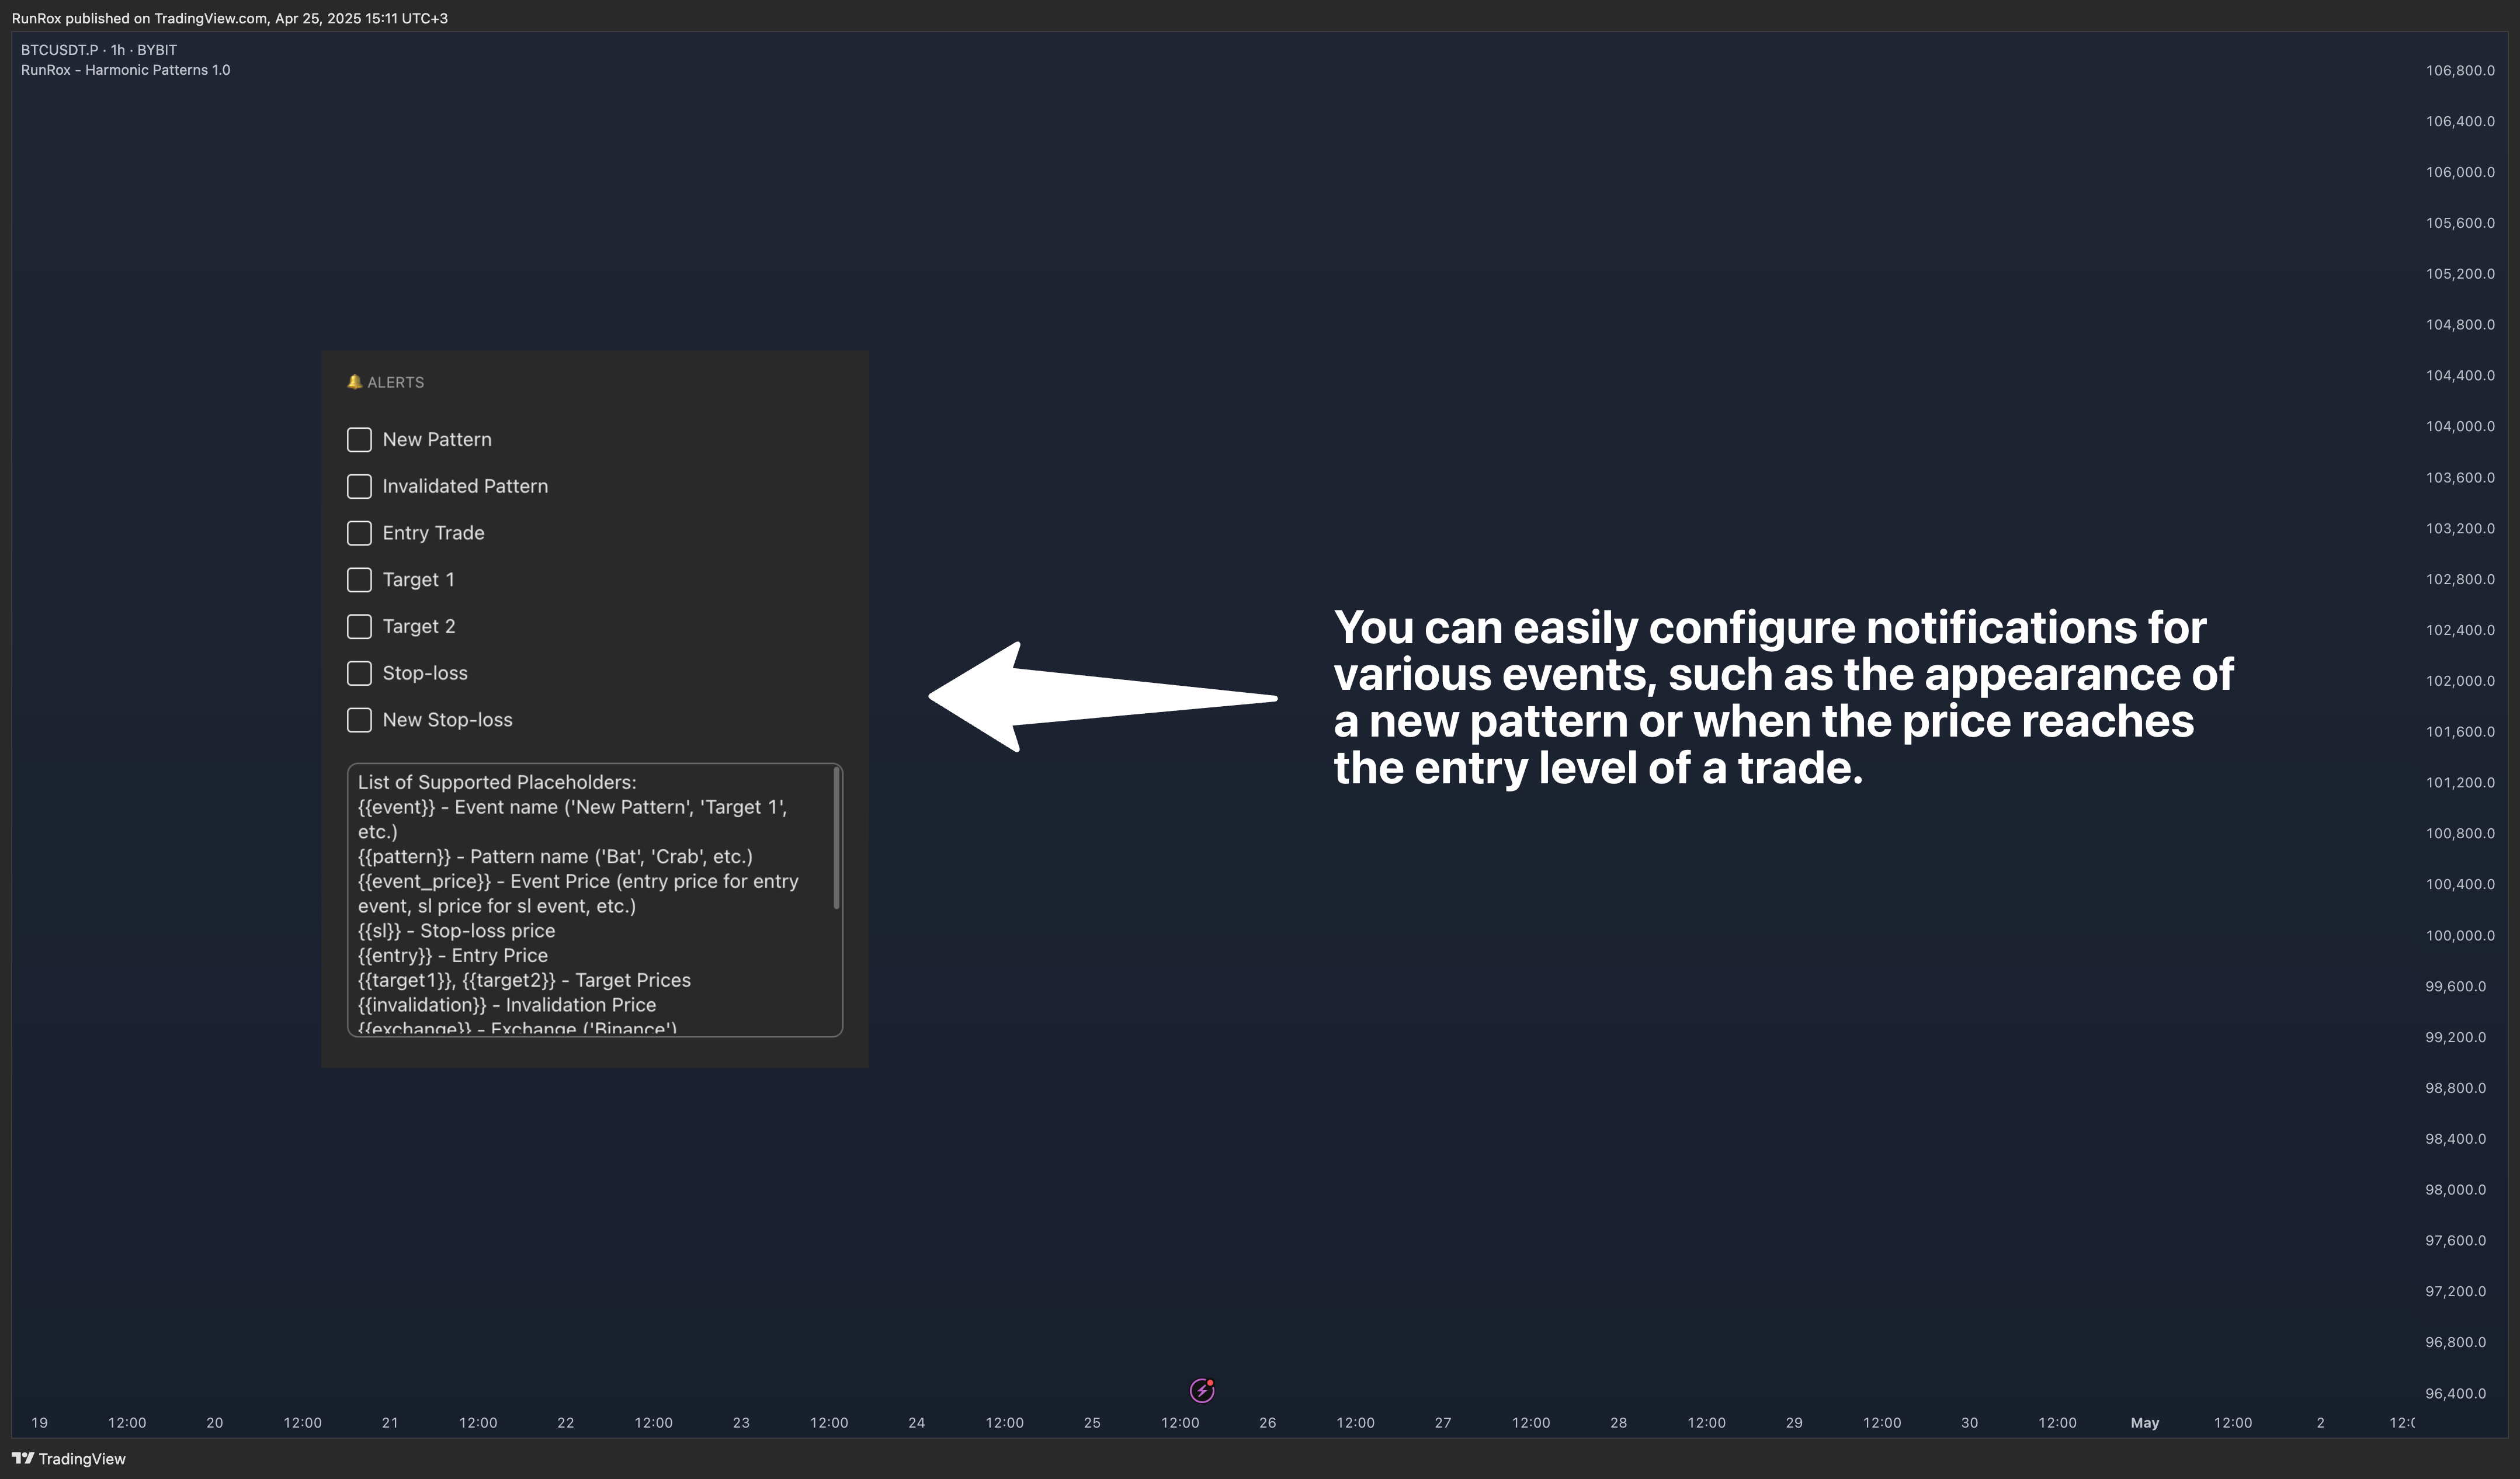
Additionally, a dedicated panel allows you to use macros for advanced customization of your alerts, so you can tailor the notifications exactly to your needs and trading style.